
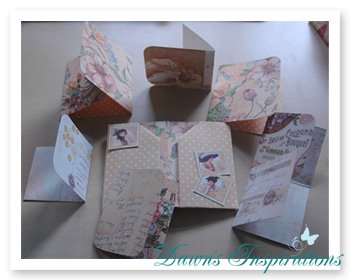
Here is the Super Quick Gatefold Envelope Mini I made for one of my Shows on Hochanda TV. I made this on the Essential Card Show as as you all enjoyed it so much I have done this video Tutorial for you.
This Super Quick Gatefold Mini Album was made using;
2 of the 5″ x 7″ Card Blanks
6 of the A^ Envelopes
1 sheet of the A4 Card
Patterned paper and ribbon from my crafting stash.
I know you will enjoy this project and making one or many too!
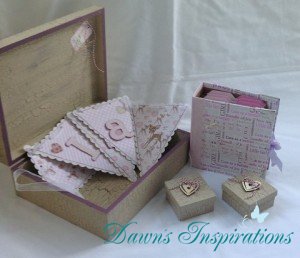
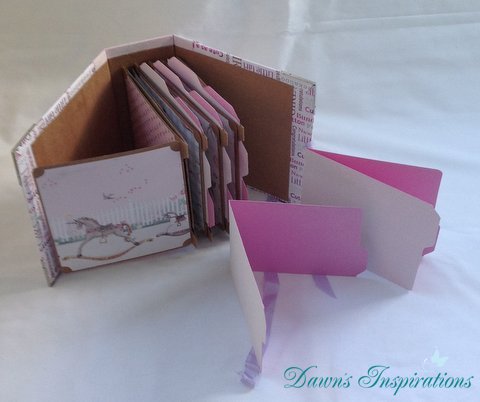
Baby Memory Box
Here is a Memory Box I have made for my new niece.
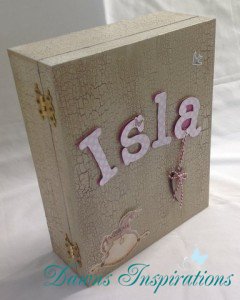
The main MDF Box came from MDF Man. I have painted this with acrylic paint and add a crackle glaze to give it a textured affect.
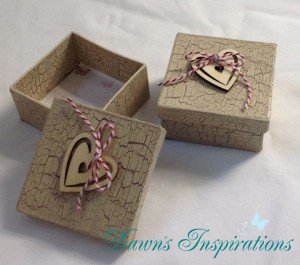
The two small boxes are paper mache boxes and I have treated these in the same way before decorating them.
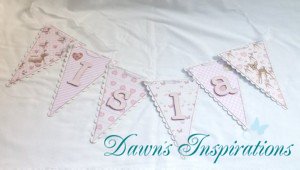
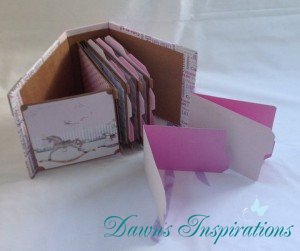
I have also added a small 6 x 6 Mini Scrapbook Album made in the same way as the Online Workshop for the Not So Mini Year Book. and a Paper Bunting Banner for her nursery.
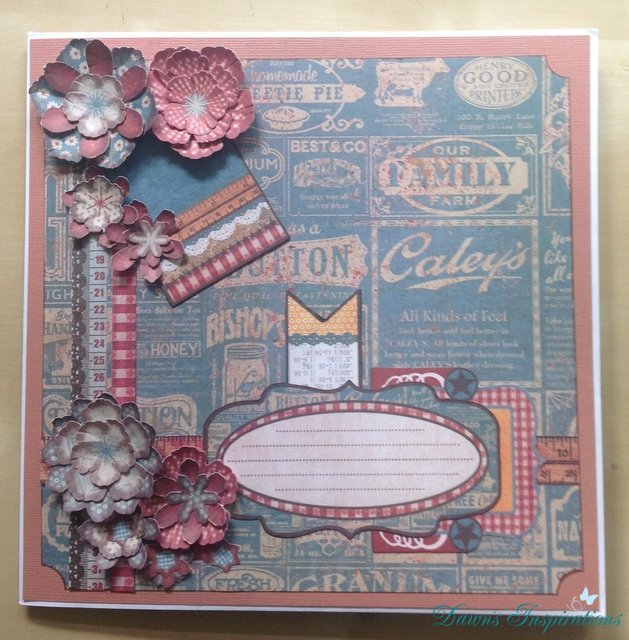
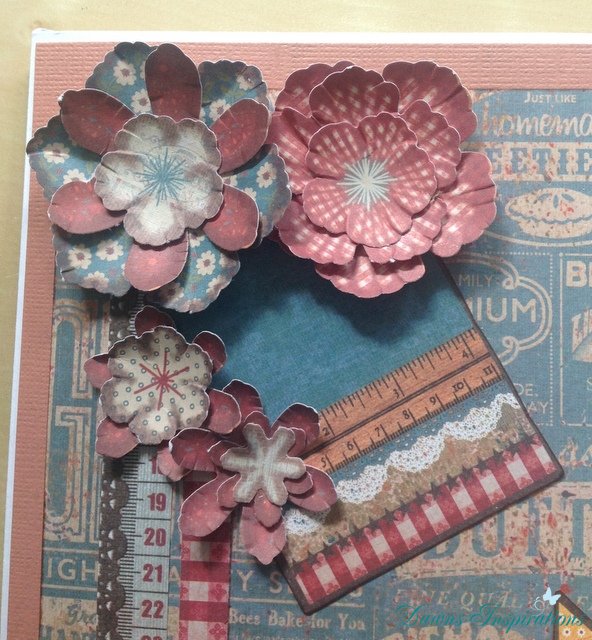
6 x 6 Mini Using the Not So Mini Year Book Online Workshop
Here is a 6 x 6 Mini Scrapbook made using the
instructions from my Not So Mini Year Book Tutorial.
The skills you will learn from the Workshop can be adapted so you can make a variety of different mini albums using different configurations.
This time I have made it using a pack of 6 x 6 Kraft cards instead of A3 cardstock.
I have also only made it with 4 pages instead of 6.
So when buying my Online Workshops you can adapt your creative skills and use the workshop time and agin to make many different types of mini albums.
Elsa’s One Page Binding Mini
These Mini albums have been inspired by Elsa of Just a Few Designs and this is my take on her awesome “One Page Binding Mini”
She has created a One Page Binding Mini in which is great as each page uses just one sheet of 12×12 double sided paptterned paper.
You can click on the links to see Elsa’s video tutorial One Page Binding Mini and to go to her blog Just a Few Designs.
I love both of these Mini Albums and by just changing the binding you can give this a whole different look.
So go a head and experiment with different ways of binding to give a different feel your mini albums.
Super Quick 8×8 Envelope Scrapbook Album
After making the Graphic45 Birthday Book, one of my subbies ask “What can I make with the leftover envelopes?”
Well here is a really quick Mini you can make!
I made this using just 4 of the envelopes, freebie paper collection (8×8 size) and some coordinating card stock.
If you don’t have this freebie you can always use any 8×8 papers or even cut down some 12×12.
Also if you don’t have any 8×8 envelopes you can make this mini with any size square envelopes.
So go no create along with me in this Video Tutorial and you too can make this super quick mini.
MDF Beach Hut with Mini Paper Bag Album Project
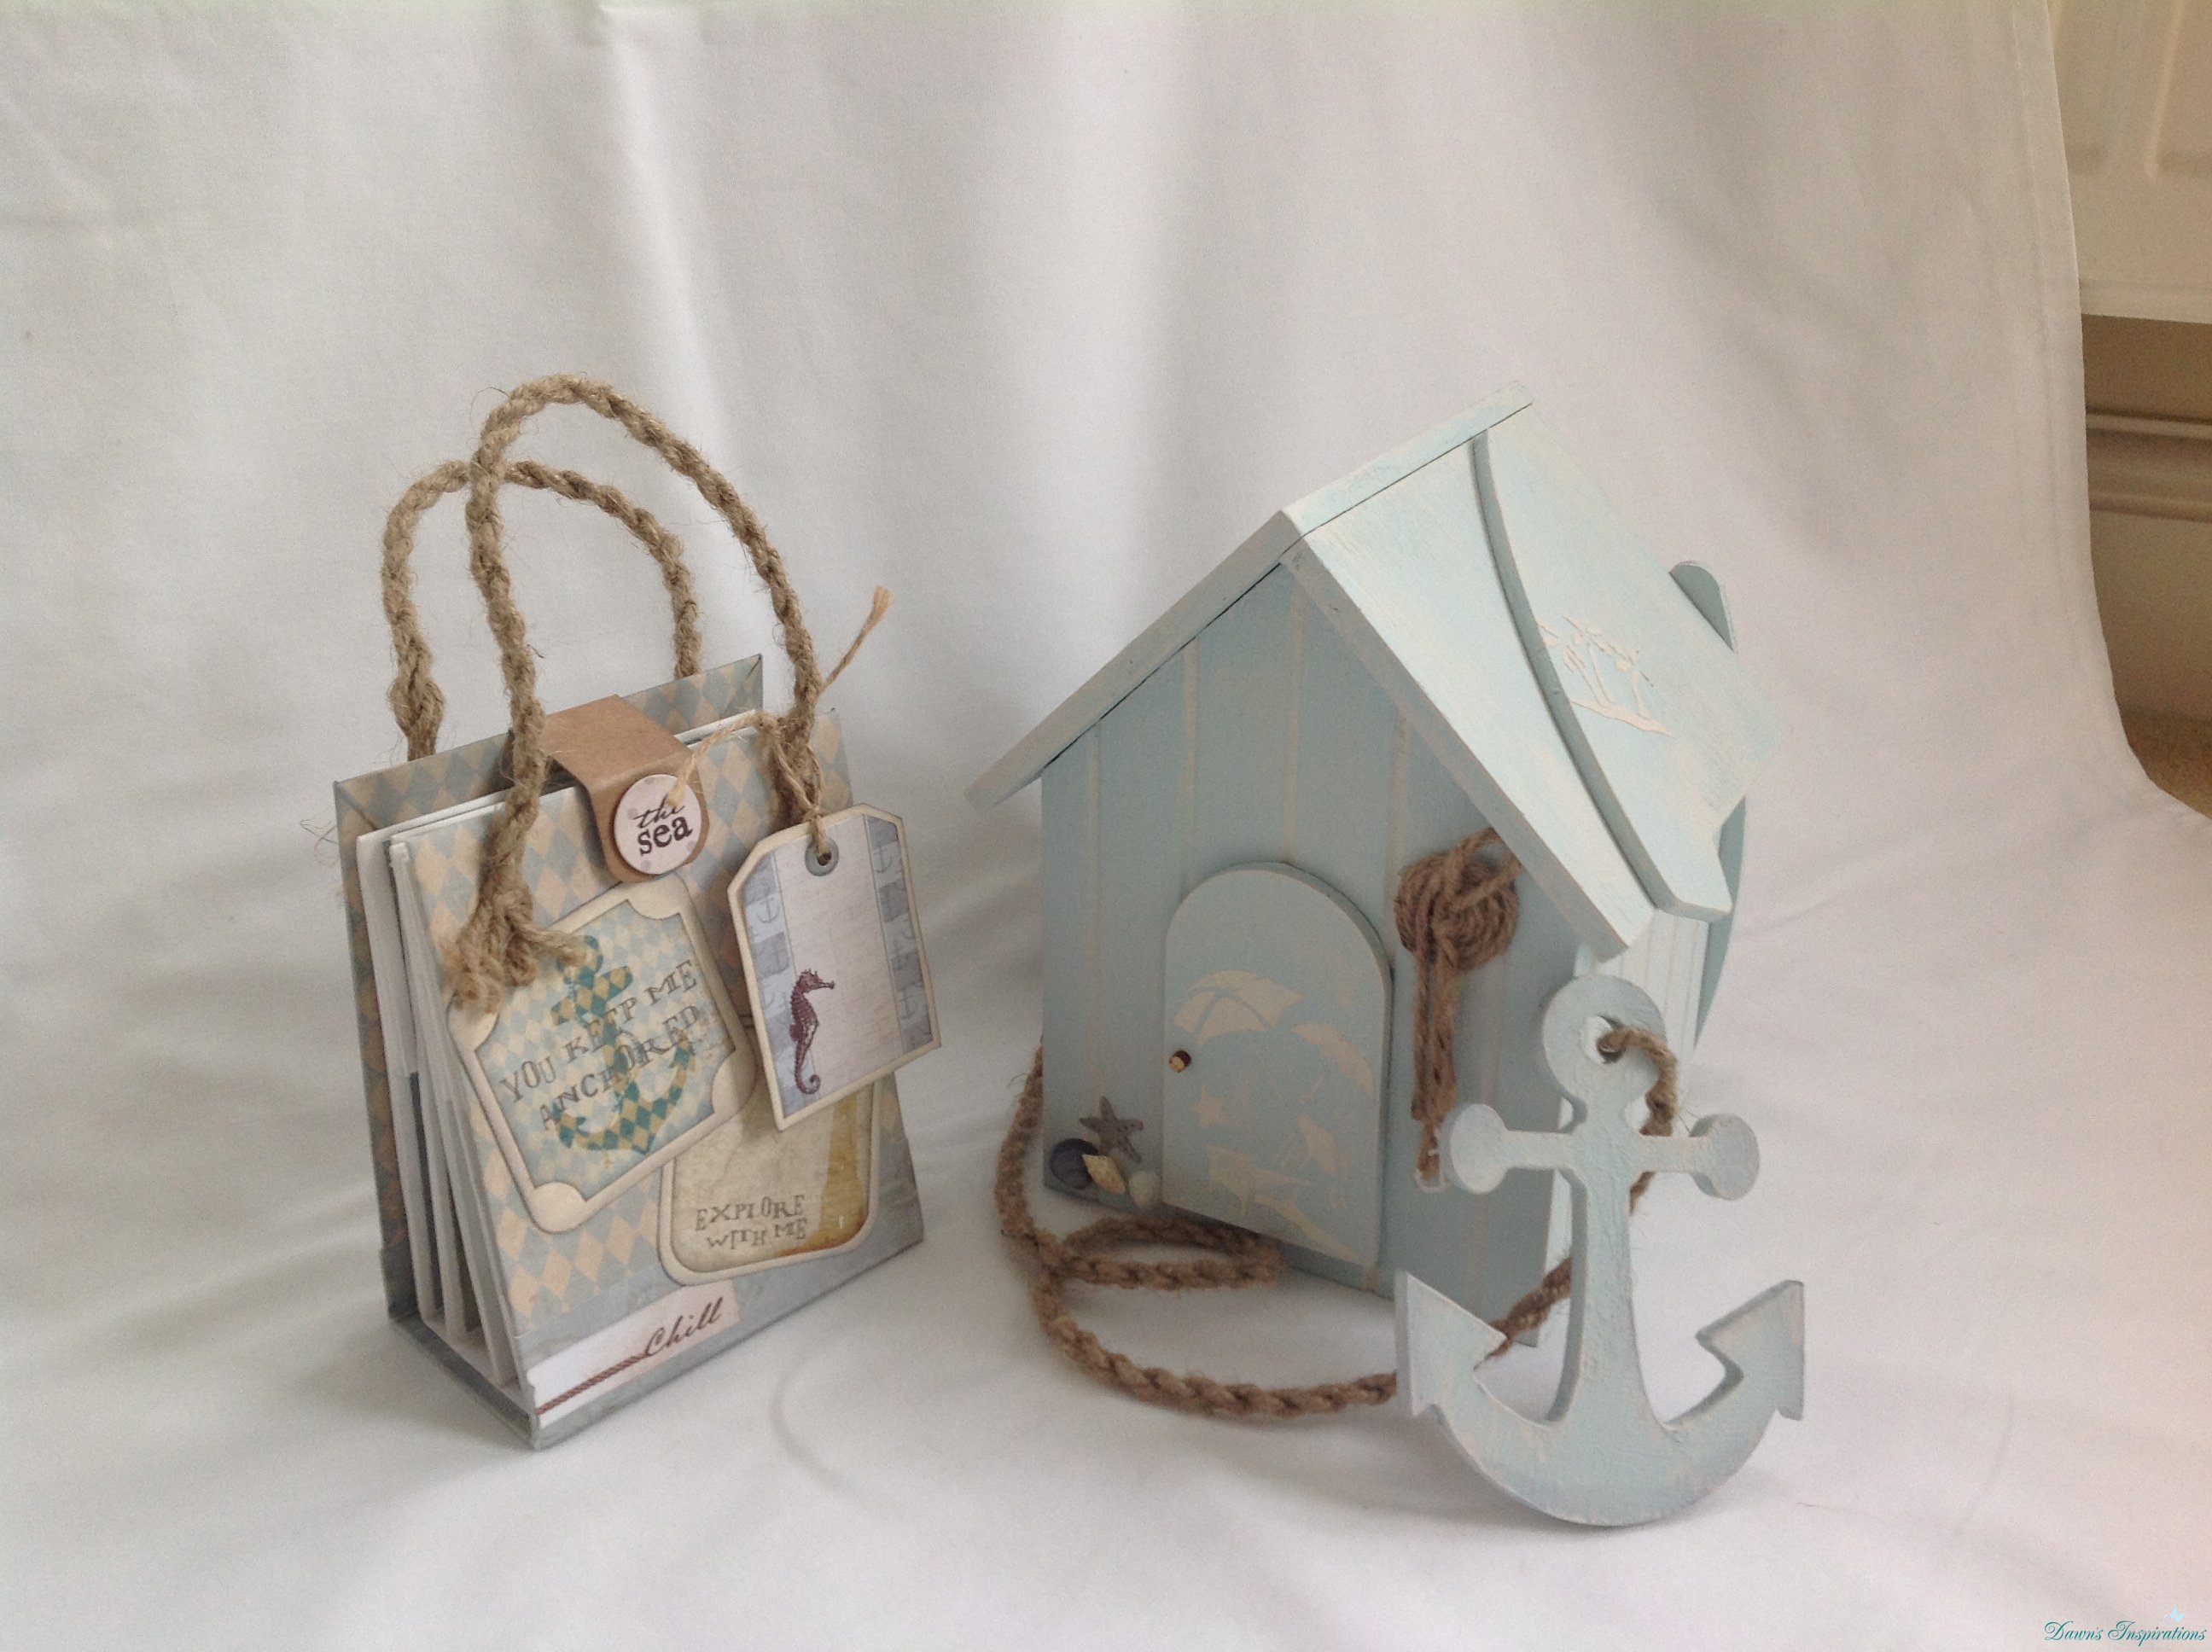
I decorative this Beach Hut at a Workshop that I attended at the MDF Mans Studios.
This was should have been a Money Box however, you know me!!! –
It had to have a Mini Album inside.
Rob (AKA MDF Man) made me a spacer for the roof so it would lift off easily and was the door for me to access the mini album.
The mini album is made using some of the papers and tags from the Prima Seashore 12×12 Paper Collection Pad.
I also used 4 white paper bags in size size 3½” x 6 ¾” x 2” which Maria kindly sent me from America.
The cover was made using a food packet box which I cut down and the rope handles are made from garden twine.
This was going to be a gift but I am finding it hared to give away, I think I may have to make another one. I do hope you like?
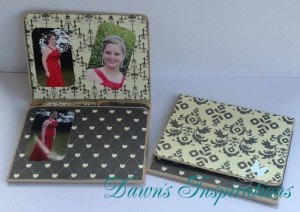
Paper Bag Pocket Wallet Mini Album
 Here is my take on a Mini Album is a designed by Steff Miller, she did a free ustream class to show you how to make it, so all kudos to Steff for a great design and I have loved making this project.
The project uses 2 paper bags and some card stock.
As for the patterned paper the Ladies Diary one I made using scraps I had left from another project and the Noir Chic one was made using new sheets of single and double sided paper.
I was requested to make a video as some of you have found it hard to follow the Ustream method.
I hope you like my video and you too can enjoy making this lovely Paper Bag Pocket Wallet Mini Album By Steff Miller as it is a super cute mini!
It is hard to give measurements as everyone will have different sizes bags depending on which country you are in but what I have done is made 2 PDF sheets for the basic measures for the 2 paper bag sizes I have used.
Paper Bag Tag Mini Album
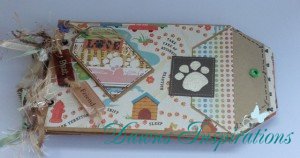 Here is a great tag book mini I have made following Stephanie Miller’s Tutorial https://www.youtube.com/watch?v=zNhsKVlIbtg.
After watching one of her other tutorials I love this idea and wanted to share it with you all.
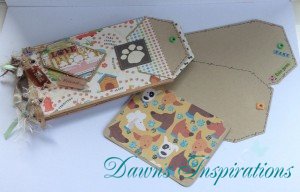 The paper collection and bags where sent to me by my subbie Maria and I have really enjoyed crafting with them.
The paper collection is DCWV The Pets Sack and I used the 4 1/2″ x 6 1/2″ papers.
One Paper Bag Brag Wallet
Here is a great little mini that is quick and easy to make.
All you need is one paper bag, some cardstock and patterned paper of your choice.
If you are in the UK and cant get craft paper bags you can still join in using shopping paper bags.
I the video tutorial I will show you how to make this mini album using both methods.
The bags size I have used is 4.7 x 2.8 x 8.9 inches.
Cut the long side of the bag to measure 8 3/4 inches, then score this at 6 inches.
Cut 2 pieces of cardstock measuring 5 7/8″ x 5 1/2″ and stock both of these at 1″ and 1 1/8″
Photo mats cut 3; 4 1/4″ x 4″
3 3/4″ x 4 3/8″
5 1/8″ x 4 3/8″
Follow the video tutorial as I craft along with you to make this super brag Wallet.
My Crafty Stash from the US
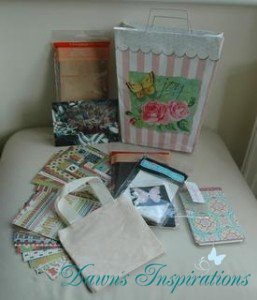 I would love to send a big thank you to Maria as she sent me this lovely gift from US.
She wanted me to do some Video Tutorials using Paper Bags, here in the UK we can not get these bags for crafting.
Here is a overview of some of the mini albums.
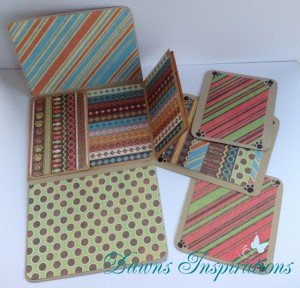
Style 6 File Folder Mini Scrapbook Album
 I know a lot of you are enjoying this File Folder Mini Series as you can make scrapbook mini albums out of a normal foolscap office file folder and freebie paper collection from a craft magazine. I have used the Bo Bunny Country Garden Collect that came free in Scrapbook Magazine Issue 80.
Here is another File Folder Mini Album for you this is made in a cheque book style.
Using one foolscap file folder, keep this folded then on the long side cut this in three 4 ½ ” strips.
Page 1/ cover – On the long side score this at 1 3/8” 1 7/8” 9 ½” & 10 “. Then cut at 7 ½”.
Page 2 – First cut the long side to 7 ½” and then score this at 7 ½” & 8”.
Page 3 – First cut the long side to 7 ½” and then score this at 7 ½” & 7 ¾ ”.
Craft along with me and follow the video tutorial then we can make this File Folder Mini together.
Micro Mini Scrapbooks
 Mini Scrapbooks out of One Sheet of 12×12.
I have had a request from one of my fellow crafters Jill to make a Micro Mini measuring 2” x 3”.
I have made them on the same theme in 3 different designs so I hope you like them?
Here are the measurements for each Mini Micro Album, now you can watch the video and make up your albums.

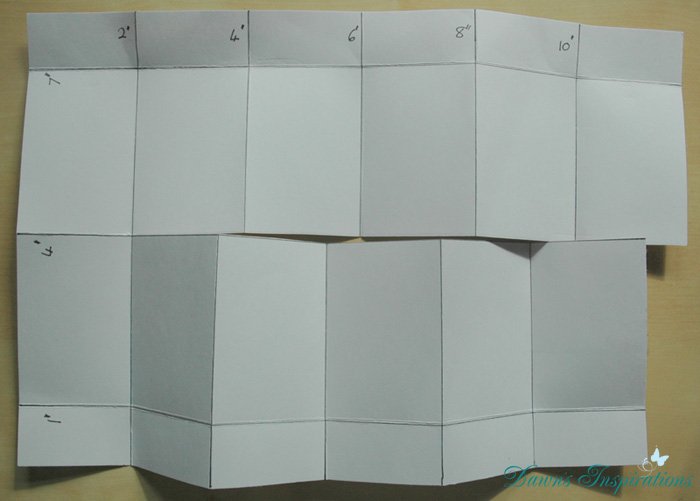
Micro Notebook Scrapbook Cut paper 12″ x 6″
on 12″ side score at 2” 4” 6” 8” & 10”
on 6″ side score at 3″
Cut along to the last score line and fold
Micro Pocket Book Paper needs to be 12″ x 8″
on the 12” side score at 2” 4” 6” 8” & 10”
on the 8” side score at 1” 4” & 7”
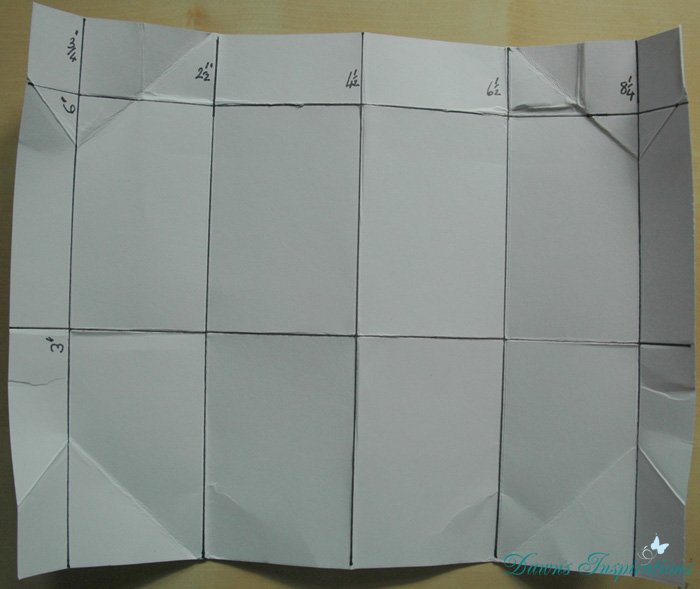
Micro Wallet Pocket Book Cut paper 9″ x 7″
on the 9″ side score at 3/4″ 3 ½ ″ 4 ½ ″ 6 ½ ″ & 8 ¼ ″
on 7″ side score at 3″ & 6″
These Micro Minis can be used as Mini Scrapbook Albums charms to add that little something different to your projects. Or even small embellishments to add to a page.
- « Previous Page
- 1
- …
- 7
- 8
- 9
- 10
- 11
- …
- 13
- Next Page »