Dawn's Inspirations

  • Shop
  • Cart
  • Account
You Are Here: Home > Archives for 2014

Archives for 2014

One Paper Bag Brag Wallet

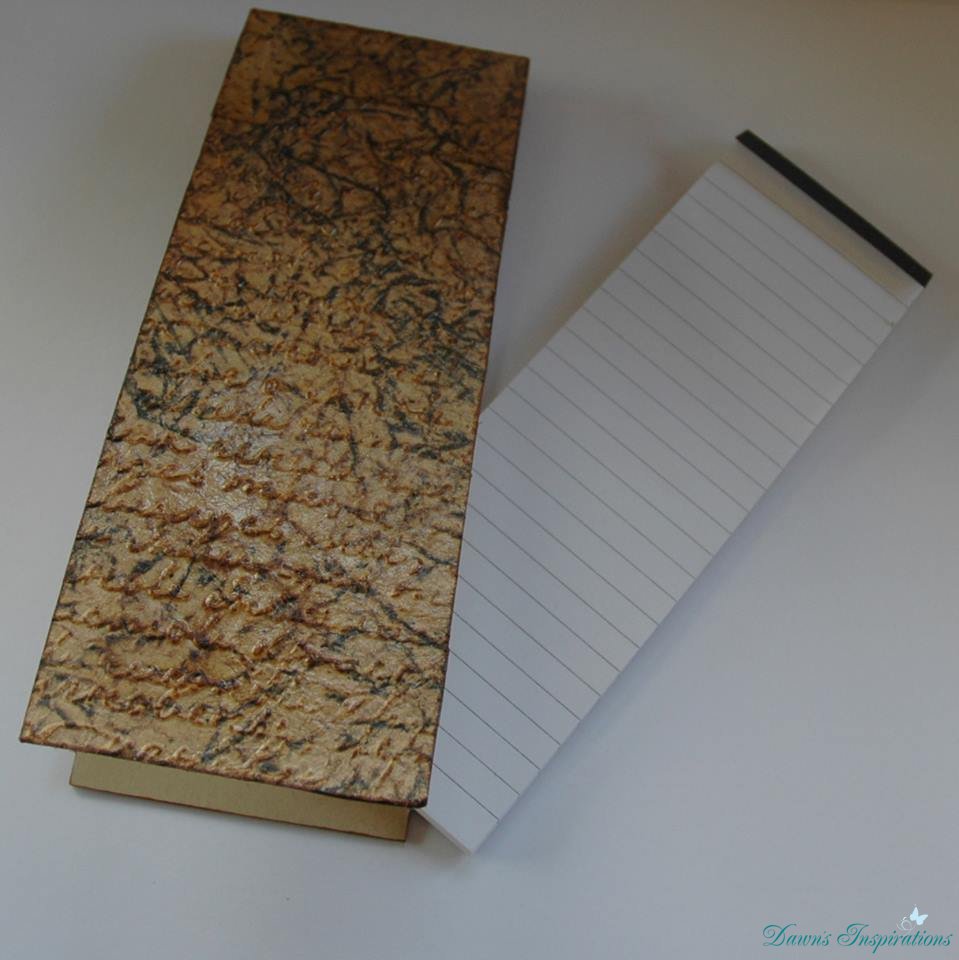
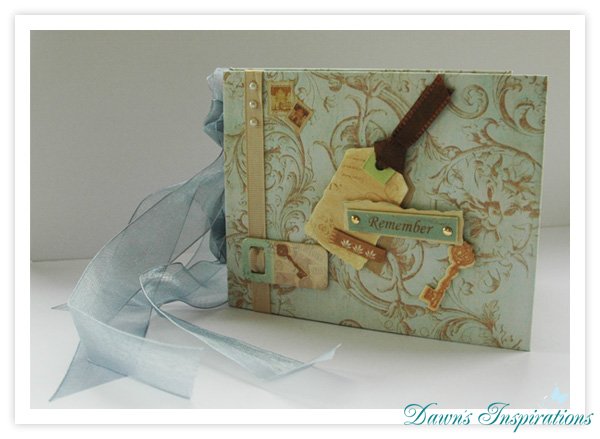
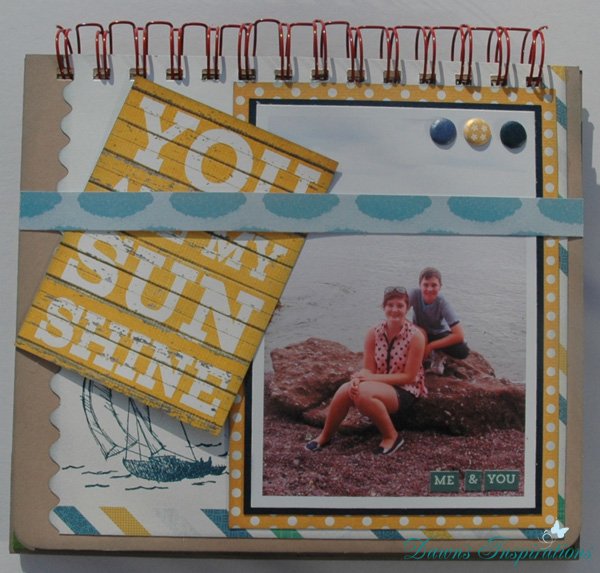
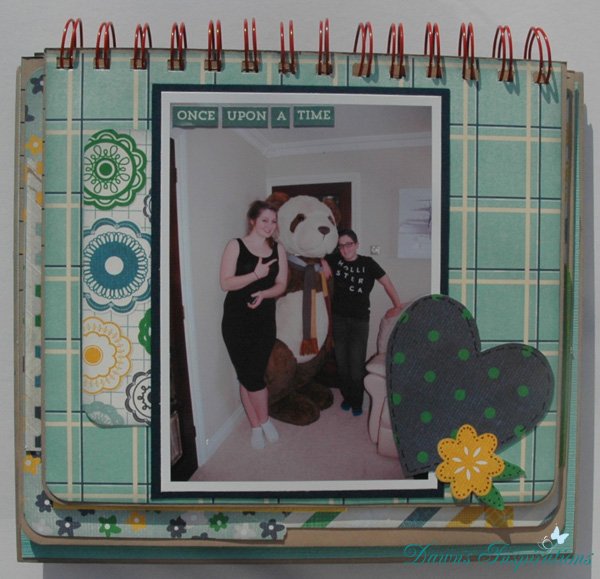
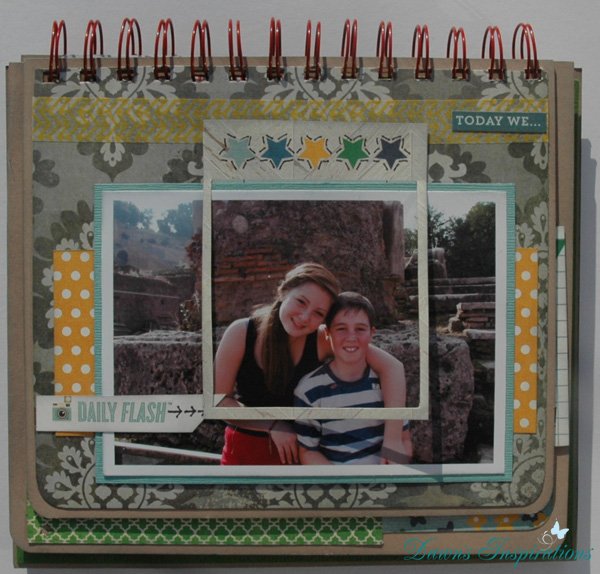
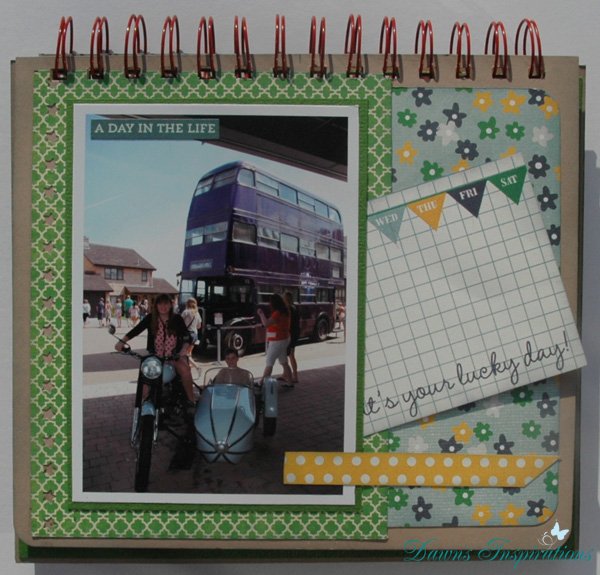
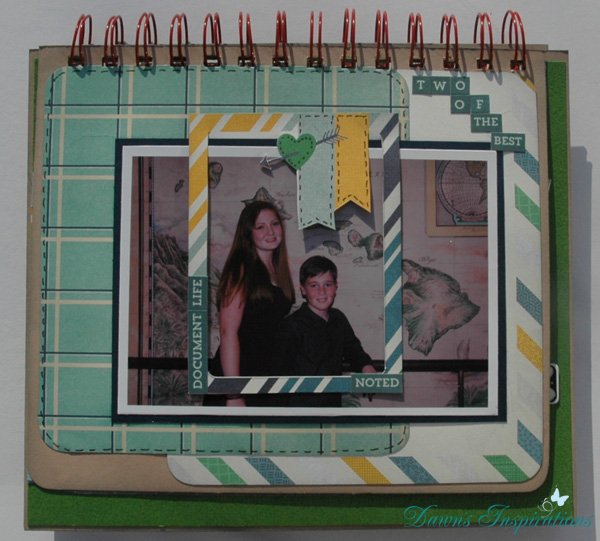
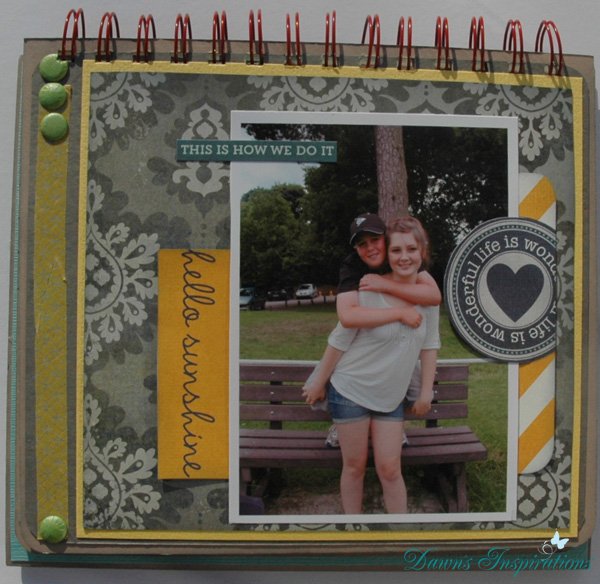
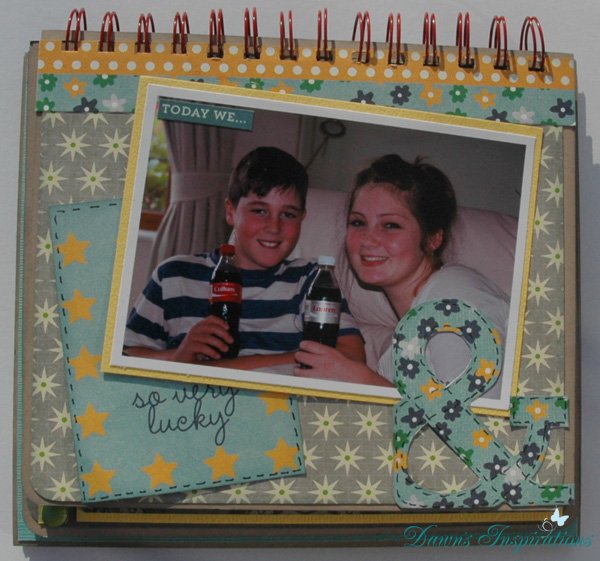
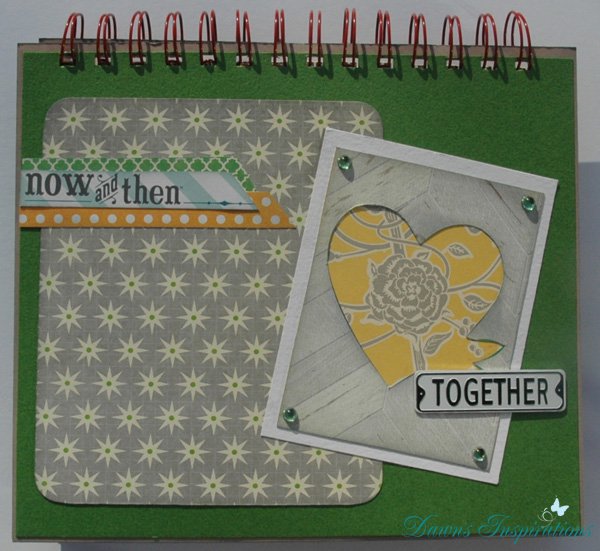
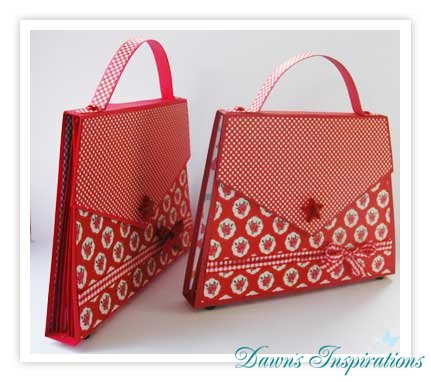
Here is a great little mini that is quick and easy to make.
All you need is one paper bag, some cardstock and patterned paper of your choice.

IMG_0931
IMG_0934

If you are in the UK and cant get craft paper bags you can still join in using shopping paper bags.
I the video tutorial I will show you how to make this mini album using both methods.

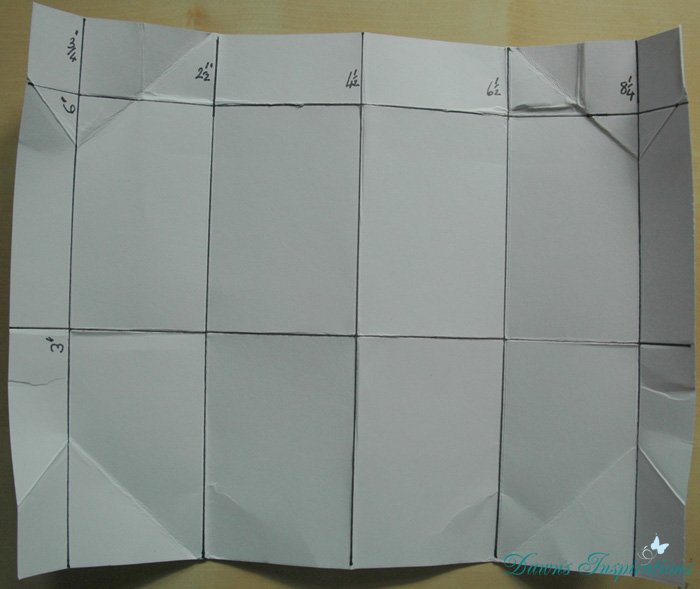
The bags size I have used is 4.7 x 2.8 x 8.9 inches.
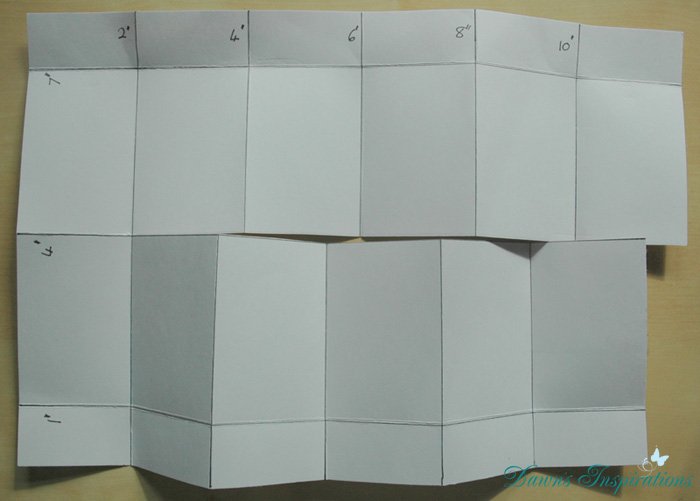
Cut the long side of the bag to measure 8 3/4 inches, then score this at 6 inches.
Cut 2 pieces of cardstock measuring 5 7/8″ x 5 1/2″ and stock both of these at 1″ and 1 1/8″
Photo mats cut 3; 4 1/4″ x 4″
3 3/4″ x 4 3/8″
5 1/8″ x 4 3/8″
Follow the video tutorial as I craft along with you to make this super brag Wallet.

Filed Under: Free Tutorials

My Crafty Stash from the US

10418241_289263151253851_8245417656583708474_n
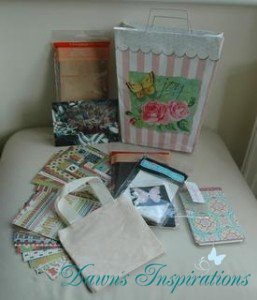
I would love to send a big thank you to Maria as she sent me this lovely gift from US.

She wanted me to do some Video Tutorials using Paper Bags, here in the UK we can not get these bags for crafting.

Here is a overview of some of the mini albums.


Filed Under: Free Tutorials

MDF Tissue Box

IMG_0919
Had a great day today at a Workshop at MDF Studio. Rob aka MDF Man and Karen showed us lots of techniques and I had a grat time making the MDF Tissue Box Cover.
IMG_0923
I cover my Tissue Box with lots of techniques, texture paste, paint, guiding wax, stamping on canvas, hessian, fabric flower making and sewing too….

Filed Under: Tips and Techniques

Style 6 File Folder Mini Scrapbook Album

file-folder-miniI know a lot of you are enjoying this File Folder Mini Series as you can make scrapbook mini albums out of a normal foolscap office file folder and freebie paper collection from a craft magazine. I have used the Bo Bunny Country Garden Collect that came free in Scrapbook Magazine Issue 80.

Here is another File Folder Mini Album for you this is made in a cheque book style.

Using one foolscap file folder, keep this folded then on the long side cut this in three  4 ½ ” strips.

Page 1/ cover – On the long side score this at 1 3/8” 1 7/8” 9 ½” & 10 “. Then cut at 7 ½”.

Page 2 – First cut the long side to 7 ½” and then score this at 7 ½” & 8”.

Page 3 – First cut the long side to 7 ½” and then score this at 7 ½” & 7 ¾ ”.

Craft along with me and follow  the video tutorial then we can make this File Folder Mini together.

Filed Under: Free Tutorials

Micro Mini Scrapbooks

micro-mini-1
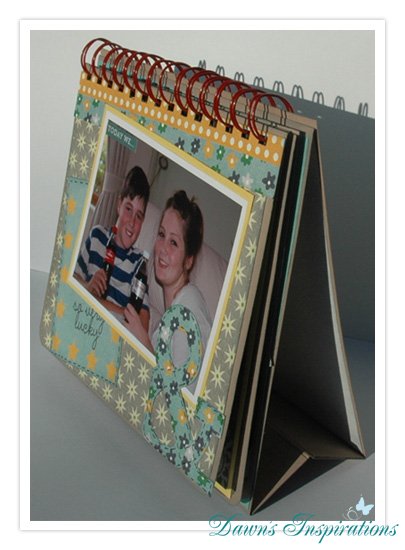
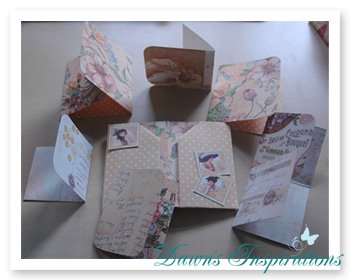
Mini Scrapbooks out of One Sheet of 12×12.

I have had a request from one of my fellow crafters Jill to make a Micro Mini measuring 2” x 3”.

I have made them on the same theme in 3 different designs so I hope you like them?


Here are the measurements for each Mini Micro Album, now you can watch the video and make up your albums.

Click  Here to View Larger Image

Click Here to View Larger Image

Micro Notebook Scrapbook Cut paper 12″ x 6″
on 12″ side score at 2” 4” 6” 8” & 10”
on 6″ side score at  3″
Cut along to the last score line and fold


Click Here to View Larger Image

Click Here to View Larger Image

Micro Pocket Book Paper needs to be 12″ x 8″
on the 12” side score at 2” 4” 6” 8” & 10”
on the 8” side score at 1” 4” & 7”


Click Here to View Larger Image

Click Here to View Larger Image

Micro Wallet Pocket Book Cut paper 9″ x 7″
on the 9″ side score at  3/4″ 3 ½ ″ 4 ½ ″ 6 ½ ″ & 8 ¼ ″
on 7″ side score at 3″ & 6″

These Micro Minis can be used as Mini Scrapbook Albums charms to add that little something different to your projects. Or even small embellishments to add to a page.

Filed Under: Free Tutorials

Another New Quick Mini Album Tutorial to Enjoy

envelope-mini-2

I am delighted to let you know my latest online Workshop is now live!! You can see it here – http://dawnsinspirations.com/shop/simple-envelope-mini-scrapbook-album-online-workshop/

Filed Under: Tips and Techniques

Card Frame for Father’s Day

card-frame-2Here in the UK Father’s Day is in a couple of weeks, so here is a quick and easy project.

The Card Frame makes a great gift, all you then need to do is slip in your 6×4 photos and you have the perfect gift to put a smile on any Dad or Grandfathers face.

So get crafty and make a special gift for the man in your life.


Supplies you will need;

2 sheets of A4 Kraft Card

I sheet of kraft packaging or chipboard

Embellishments if you wish

2 photos of 6×4 measurements

Measurements;

Cut one of the A4 sheets to measure 7″ x 11 1/2 ”  Next I put this through my Ebosser using the A4 Cable embossing Folder.

I then on the longside scored this in 5 1/2″ on either end. Using a distress ink pad I then inked over the embossed pattern to show more texture.

Next I stuck this down to my Kraft packaging/chipboard using Collall All Purpose Glue and set it to one side to dry. While this is drying you can then make your frames.

From your other sheet of kraft card cut 2  pieces measuring 5 1/2″ x 6 3/4″ and score this in at 1/4″ on 3 sides. Now using a cutting die or kraft knife make an aperture frame to showcase your photos. Ink you edges to match your project.

Using your stamp of choice you can stamp a background to your cover to give this a patterned look. I then used a letter stamp set to make my words to give my project a personal touch. I cut these out and stuck them down with 3D Glue.
card-frame-1
Your Card Frame is now ready for you to add your photos and give as a gift for Fathers Day.

Other ideas for Fathers Day Gifts

Slider Card Tutorial

Faux Leather Notebook Cover Tutorial

Desktop Flip Style Mini Album Tutorial


Filed Under: Free Tutorials

Desktop Flip Style Mini Scrapbook Album

flip-style-mini
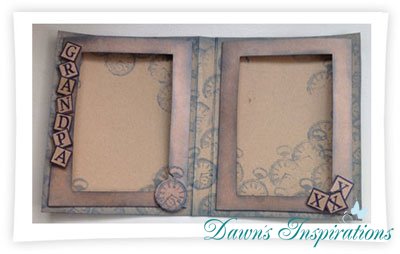
This project was a request from one of my followers Leslie so I do hope she enjoys my tutorial?

I have made this project using a Scrapbooking Kit from Papermaze and a foolscap file folder.

I really enjoyed this project as it meant I could do lots of mini scrapbook layouts, you do not need to add photos you could use quotes instead. Why not use your favourite inspirational quotes or sayings.

This make a great gift for both male and female and can be made to fit any age too.

So let you creativeity loose and enjoy making this project.


The video tutorials are on a playlist so the next one will follow once the first one if finished.

Measurements for the project – follow the video tutorial to make this project.

Using a foolscap file folder;  fold this in half and cut it to measure 8″ x 8 1/2″ (do not cut on the folder side)

Put your folded side up to the edge of your score board and score this at 1 1/2″.

From the scaps cut 4 pieces measuring 8″ x 1 3/8″ these are to reinforce the base.

Next cut 4 pages, 2 measuring 7 3/4″ x  6 3/4″ and 2 measuring 7 1/2″ x 6 1/2″.

Using A4 cardstock;  You will need 6 sheets.

Cut 2 piece measuring 8 1/2″ x 10″. Next use your scraps and cut these at 8 1/2″ x 1 3/8″.

Then on the londside score at 7″ and 8 1/2″.

Next cut 4 pages, 2 measuring 7 3/4″ x  6 3/4″ and 2 measuring 7 1/2″ x 6 1/2″.

Binding your project; This can be done in one of 3 ways, using a Bind it All, a Cinch or book rings.

So get creative and make your own Desktop Flip Style Mini Album.

Page Layouts


Filed Under: Free Tutorials

New Online Workshop Now LIVE!

mini-handbag-album-tutorialHere is a quick mini album that you can put together in an afternoon – just perfect if you are at a loose end!

Click Here for More Information


For craft magnets I use first4magnets.

Filed Under: Tips and Techniques

Faux Leather Notebook Cover Tutorial

By popular request this quick tutorial not only shows you step by step how to achieve that faux leather look to your cardstock.10246770_270674629779370_6090556380790155803_n

But I also show you how to make a notebook cover.

So it is a cover you can refil and use time and time again.

This make a great gift and you can choose your own colours to give it a really personal look.

Filed Under: Tips and Techniques

Demo Day with Dawn

sara2006_OldridsDowntownSuperstore02_1

I am now a Crafter’s Companion Accredited Demonstor

so come along and join me as I do my first in store Demo Day.

Drop by Downtown Superstore in Grantham UK on

Saturday 3rd May between 10am and 4pm.

pencils-info-page_04  pencils-info-page_03pencils-info-page_02


I will be demonstrating The Brand NEW Spectrum Noir Pencils and you will be able to see the how to use them on their own or combined with Spectrum Noir Pens.

The combination of the two togther will bring you colouring to a whole new level!


I will be  demonstrating the popular Die’sire dies and fabulous Embossalicious embossing folders range, along with the cute Angelica & Adam papercrafting range, the colourful Spectrum Noir alcohol ink markers and the brand new Spectrum Noir blendable pencils!

Special offers will also be available on the day in store so don’t miss out!

Read more: http://ymlp.com/zt5s7x

Filed Under: Tips and Techniques

Flower Embossing Folder Cards

Flower Cards

Both these cards have been made using the Die sire Ebossalicious 8×8 Folder in the Floral Stitch design from Crafters Companion.

I have used them for back ground and inked over them and them I have also used them as an embellishment on my cards.

By embossing Co-ordinatations cardstock and sanding it back you get a different affect. Them by fussy cutting out the flowers you can then arrange them and use them as embellishments.

Just add some matting and layering and extra ribbons and bring you have a great card using very few materials.

I have then personalised these cards using the Die sire Alphabet Dies.

So go on have a go and use you embossing folders in a different way.

flower-cards-02


Filed Under: Tips and Techniques

  • « Previous Page
  • 1
  • 2
  • 3
  • 4
  • 5
  • Next Page »
  • My Account

Copyright © 2025 · Dawns Inspirations ·