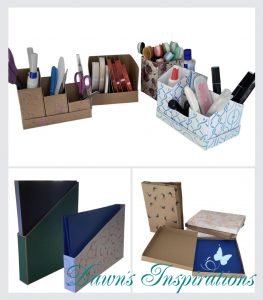
Now is time to get your Craft Space organised!
You to can make some quick and easy craft storage with Pink Frog A3, A4 and 12×12 Card stock.
Now is time to get your Craft Space organised!
You to can make some quick and easy craft storage with Pink Frog A3, A4 and 12×12 Card stock.
I have been making these Cracker Boxes for years but not just for Christmas as I do them for Easter and even gift giving anytime of year.
My “Fill your own Cracker Boxes” are great at Christmas as you can get nicer gifts inside and other treats too! Just like my “Fill Your Own Advent Calendars” .
These can be used year after year if you store them and my original ones are 20 years old so thought it was time to update them as the children are older now.
Take an A4 sheet of card and on the long side score at 2 3/4″ – 5 1/2″- 8 1/4″ and 11″.
Then on the short side score one end at 2 3/4″ and then do a half turn and on the other end score at 1″- 1 1/2″ and 2″
To make a lid, cut a piece of card at just under 4 3/4″ x just under 4 3/4″ ( this means your lid will fit inside your cracker box top.)
If you watch the video I give you all the measurements for all the mats and layers, plus it is filmed in real time so you can have me with you in your craft room making your own Cracker Boxes.
Have fun and enjoy making yours!
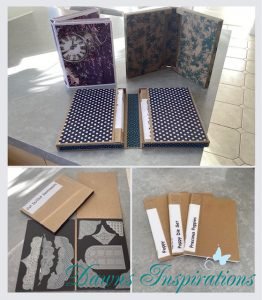
Here is a quick video to show you how to make your own slip cover for the Pink Frog 6″ Memory Books. By adding a slip cover this makes it the perfect way to present a gift.
Cut 2 pieces of Card ( 250-300gsm) at 8 1/4″ x 10 1/4″
Score both pieces on long side at 2″ at both ends and on the short side at 2″.
Then watch my real time video to see how to put the slip box together.

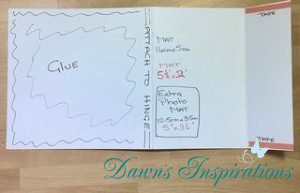
Using just one sheet of Pink Frog speciality A3 card I made this one sheet invitation. with the pocket you have plenty of room to add extra cards of information. this idea would work well for many occasions. I demonstrated this on Create and Craft TV during the Pink Frog Card and Crafts Show.
Here is my step by step video with all the measurements you will need.
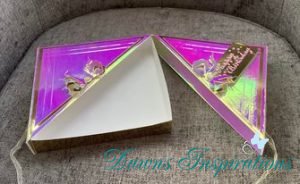
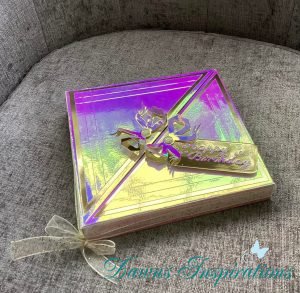
You to can make beautiful stunning gift boxes like this! with just a couple of sheets of A3 Card, I used the Pink Frog A3 card as this is great quality for construction projects.
I have put together a quick step by step video with all the measurements and know how you need to make up your own. so grab your supplies and have fun.
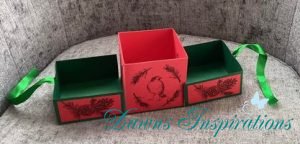

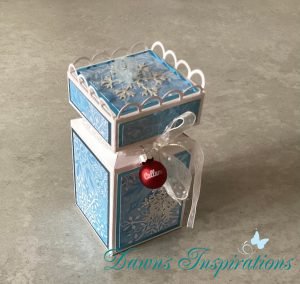
How to make this super quick and easy Box in a Box -Gift Box. Ideal for any occasion and makes even less expensive gifts look fabulous.
you make have seen me demonstrate this on Create & Craft TV and many of you have asked to see it again so see the video below for measurements and how to put this together.
The card and products used in this project are from Pink Frog Card & Crafts
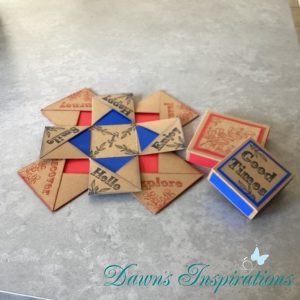
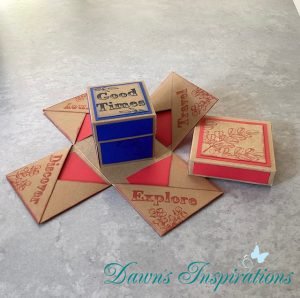
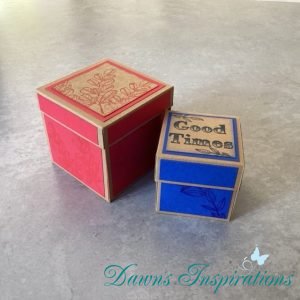
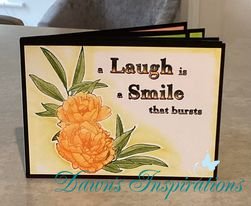
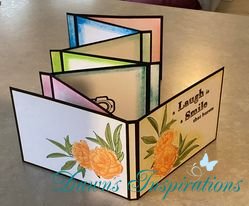
These Two sizes of Exploding Boxes fit so nicely nested together and can be used to hold photos or as a change from a standard birthday card.
You may have seen me demonstrate these on the Pink Frog Create & Craft TV Show. I have given you both imperal and metic measurments so you can create your own.
Imperal Version – Large Exploding Box
Imperal Version – Small Exploding Box
Metric Version – Large Exploding Box
Metric Version – Small Exploding Box
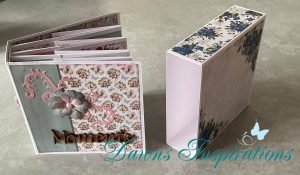
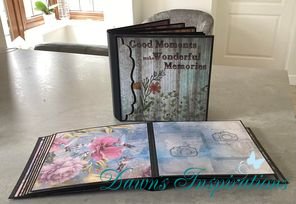
This One Hour 8×8 Mini Album is a fantastic Super Quick Project! Deciding on your papers will take you longer. This Mini Album will hold 36 6×4 photos so idea for keepsake gift giving.
 Supplies you will need are;
11 x A4 Cardstock at least 250 – 300gsm
2 Grey Board
21 sheets of 8×8 Patterned Papers
Tools needed ;
Scoreboard
Paper Trimmer
Bone Folder
Glue
Dies for cutting decorative edges optional
This hinge system is great as your project lays nice and flat while you view the pages.
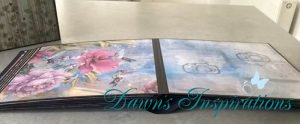

Now gather your supplies and Craft along with me in real time so you can also make your own 8×8 in an Hour.
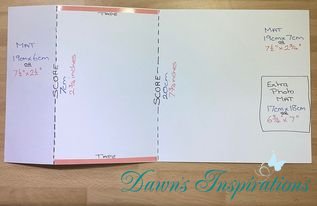
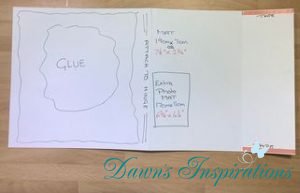
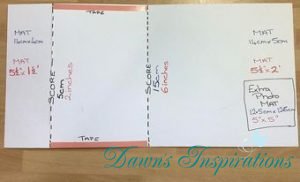
Card cut at;
1 at 8 1/4″ x 8 1/2″ OR 21cm x 22cm
9 at 8 1/4″ x 10″ OR 21cm x 25.5cm Score at 8 1/4″ & 8 1/2″ OR 21cm & 21.5cm on the long side.
1 at 8 1/4″ x 7″ OR 21cm x 18cm Score at 2 1/4″ OR 5.75cm in on both ends on the short side.
Cut Grey board at;
2 at 8 1/4″ x 8 1/2″
Patterned Papers;
20 at 8″ x 8″
1 x for decorative edges of your wrapped hinge.
If you fancy trying the 6×6 original version here is the link https://dawnsinspirations.com/1-hour-6×6-mini-album/
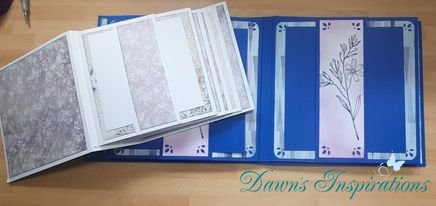
If you are loving your 8×8 and 6×6 Memory Books using the Memory Book Kits from Pink Frog, why not try out this New Page Style to give your Memory Books a totally different look and the great thing is you can do with without buying any extra cardstock to go with these fabulous Memory Book Kits from Pink Frog.
I have also given you all the measurements in Inches and Centimetres so you choose which you like to work in.
8×8 Memory Book
PLUS the Step by Step Videos for both sizes of Memory Books.
Centimetres 8×8 Memory Book
Inches 8×8 Memory Book
6×6 Memory Book
PLUS the Step by Step Videos for both sizes of Memory Books.
Centimetres 6×6 Memory Book
Inches 6×6 Memory Book
Memory Book Kits are available here https://www.pinkfrogcraftsandcards.co.uk/pink-frog-crafts-memory-book-kits-314-c.asp and come in 8×8 and 6×6 Size.
With each Kit you can make 4 Memory Books and they come will full instructions and Cutting/Scoring Guide.
If you prefer a Step by Step Video to go with your Kits this is also available here https://dawnsinspirations.com/shop/8-8-memory-book/
This super quick project is perfect when you fancy an couple of hours crafting making a project from start to finish. I used the 15cm x 42cm Card stock from Pink Frog.
This gives a nice size for adding 6″ x 4″ photos in so a good size Mini Album. Making them perfect for give giving as they holding 14 photos.
So gather your supplies and let make this super cute Concertina Mini Album.
Cover
Pages
Decorative Mats Outside Cover
Decorative Mats Inside Cover
Decorative Mats Page Mats
I love seeing what you make so please feel free to share over on my Facebook Page.
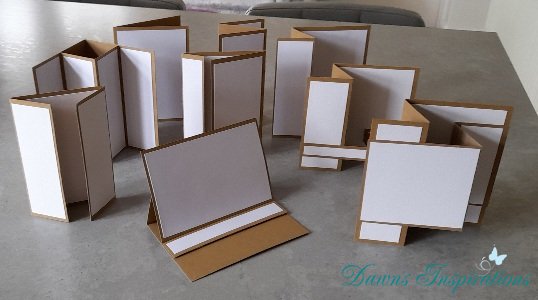 Here is all the measurements you need to make your Pink Frog 15cm x 42cm Unscored Card Blanks into C6 Card Blanks. This means you get even more versatility for your card blanks.
Card Fold Instructions to turn 15cm x 42cm to C6 Cards
Firstly cut your 15cm x 42cm Card Blanks to 15cm x 21cm
C6 Half Fold Score on long side at 10.5cm
C6 Tri-Fold Score on Long side at 7cm and 14cm.
C6 Z Fold Score on long side at 5 cm and 10cm
C6 Double Z Fold Card 1—score on long side at 5.5cm and 10.5cm
Card 2—Cut to 10cm x 21cm and score on long side at 10.5cm and 15.5cm
and off set join both pieces together.
C6 Bar Double Z Fold Score on long side at 5.5cm and 10.5cm
and then cut to measure 13cm x 21cm
and off set join both pieces together.
C6 Gate Fold Cut card to 15cm x 20cm and score on the long side
at 5cm from each end.
C6 Side Gate Fold Score on long side at 7.5cm and 18cm
C6 Easel Card with Mat Score on long side at 5.5cm, then at 10.5cm
Cut an extra mat at 15cm x 10.5cm and a stopper of your choice.
C6 Pop Out Card – Card 1 – Score on long side at 10.5cm.
Card 2- Score on long side at 10.5cm and then in at 5.5cm at each end.
Then attach card 2 to card 1

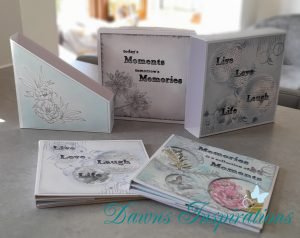 Here are 3 different ideas to use as Presentation Boxes or Storage for your Foto Folios & Size 8 Memory Folios .
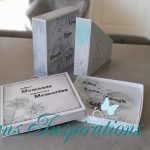
The Slip Cover, The File Box and the Presentation Box are fabulous ways of taking your Foto Folio & Memory Folios to another level.
Not only I filmed you a Step by Step Video Tutorials but I have also created PDFs in both Inches and Centimetre Versions for you to print off and keep.
I do hope you enjoy these super quick How To projects?
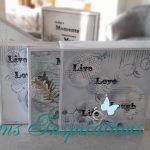
Slip Cover
File Box
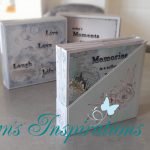
Presentations Gift Box