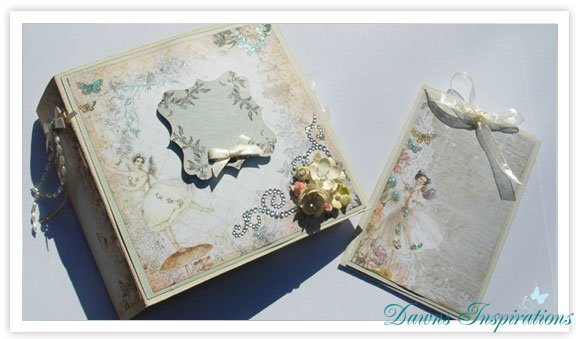
 I will show you not only how to make you own slider cards but also how you can make a Slider Mini Album too.
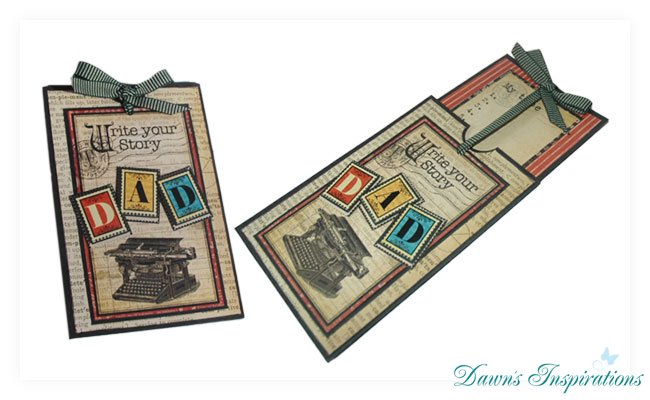
To make a Slider Card to fit in a C6 envelope.
a C6 envelope is roughly 6.4″ x 4.5″ so to make a slider card to fit in this size envelope you will need to cut your card stock 8 1/2 “x 6 1/2″.
On the short side score this at 6″ the quarter turn and on the long side score this at 4″ & 8”.
Cut another piece of card measuring 3 3/4″ x 5 1/2″ this is be the slider. You will also need a lengh of ribbon roughly 24″long and patterned paper to decorate.
Now watch the video tutorial and craft along with me to make your slider card.
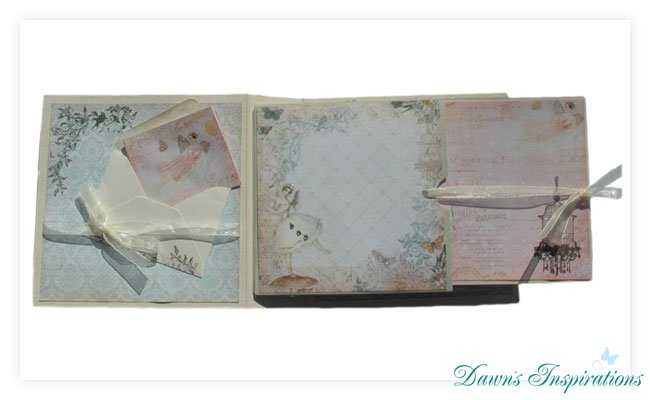
To Make your Slider Mini Album.
You will need 4 sheets of 12×12 cardsock, a 6×6 paper pad collection, an empty cereal box for the cover, acrylic paint ribbon and embellishments.
Put 1 sheet of 12×12 cardstock on your scoreboard and score at 5 3/4″ and 6 1/4″.
Do a quarter turn and score at 1/2″ to the scecond score line only.
Then do a half turn and score at 1/2″ to the second score line only.
Flip your paper over and score at 5 3/4″ to the first score line.
Do a half turn and score at 5 3/4″ to the first score line.
Then watch the video tutorial to cut the cardstock so you can get 2 pages from 1 sheet of 12×12 cardstock.
Follow the rest of the video tutorials and craft along with me to make this great Slider Mini Album
Hi, my name is Laura Im from Juárez, Chihuahua México, I love your work and your creations. Your explicación is perfect thanks
Hello Mexico!
Thank you Laura for taking the time to message me. I am so glad you are enjoying my tutorials and can understand me.
Happy Crafting Dawn x
I would like to thank you so much for doing these albums, I have some friends we get together to do craft things for birthdays mainly. Please keep up the good work.
Take care happy crafting.
Regards
Janet McNeilly
Hi Janet,
So good to hear you are crafting with friends and enjoying the tutorials. This is a great project and great for female and male birthdays. Enjoy Dx
Thank you Dawn – you truly are an ‘inspiration’ in so many ways… I shall be trying this once I get the magazine. I wonder what you do work wise as you are brilliant at design, measuring/maths & teaching…..Thanks for sharing with us. Dawn
Hi Dawn, so glad you are going to have a go at this tutorial, it is a lovely project but a lovely afternoon project.
I work now as a freelance craft demonstrator and run a couple of Scrapbooking classes a month and also an annual Scrapbooking Weekend Retreat, along with being a full time Mum. Before children I was a Nursery Nurse running a Day Nursery, so that’s where the teaching and creativity come in I think. Dawn x