Just thought I would share with you the Project the crafters made at my 2020 Weekend Scrapbook Retreat.
Pocket Size Brag Wallet
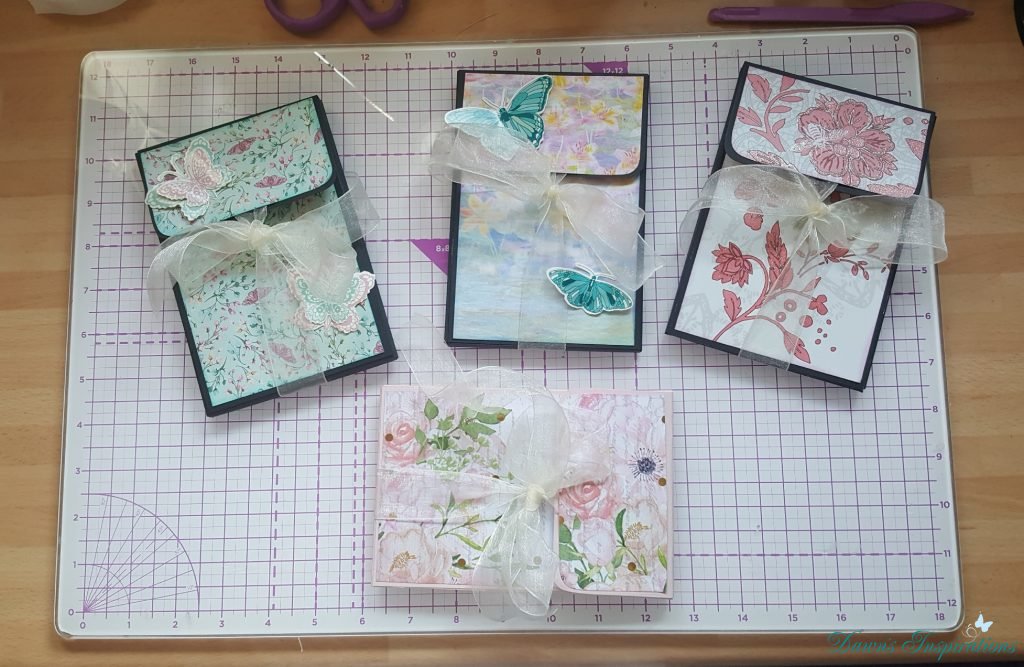
This Cute Pocket Brag Wallet is so quick to make and makes a great gift to post on to someone you care about while we are in the Covid19 Lock down. What better way to cheer someone up if they received this through the post.
You will need;
3 x sheets of A4 Cardstock
2 x sheets of 12 x 12 Patterned Paper or Any patterned paper you have
2 x Ribbon approx 12″ long
Instructions;
Take one sheet of A4 card and score 2 1/2″ 2 3/4″ 9″ & 9 1/4″ on the Longside.
Do a quarter turn and Score at 1 3/4″ 2″ 6 1/4″ & 6 1/2″ on the short side.
Cut away the corner squares – See the video for this
Burnish all your Score lines. and Corner rounder the top small flap.
With another piece of A4 cut out 3 x 4 1/8″ x 6 1/4″ and attach these to the other 3 sides of the main project. – See the video for this
With the last piece of A4 cut so you have 2 pieces of 5 3/4″ x 8 1/4″ and then score both of these on the long side at 4″ and 8″. –See the video for how to attach these.
Patterned Paper Sizes;
8 @ 4″ x 6″
2 @ 4″ x 2 1/4″
8 @ 3 3/4″ x 5 3/8″
For the waterfall long;
Cut 3 @ 4″ x 5 3/4″ Score 1/4″
Pattered Papers cut 6 @ 3 3/4″x 5 3/8″
Book Style;
Cut 3 @ 4″ x 5 7/8″ score 1/4″
Pattered Papers cut 6 @ 3 3/8″ x 5 6/8″
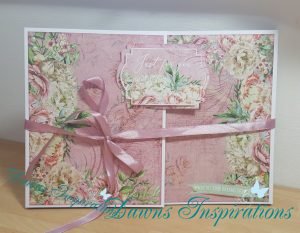
Mini Brag Wallet in a Box
This Mini Brag Wallet in a Box makes a great keepsake gift to give or just perfect for putting all photos into from one event.

Presentation Box
Box Base cut a square 7 ¾” x 7 ¾” and score in ¾” on all four 4 sides.
Box Lid cut a square 7 7/8” x 7 7/8” and score in ¾” on all four sides
Papers for lid cut one at 6”x 6” and cut 4 at 6” x ¾”
Paper for the Bottom Base 6” x 6”
Brag Wallet
Main Back – Take 12”x 12” Score on at 2 ½” and 3” on all four sides
Top Flap – Cut 6”x 4 ½” and stick to the top.
Bottom Flap – Cut 6”x 6” and stick to the bottom.
Right Side – Cut 11” x 6” and score at 6” and stick to right hand side.
Left Sided – Cut 12” x 6” and score at 6” and 10” and don’t stick it down yet. Cut 2 photo mats one at 5” x 5” and the other at 3 ¼” x 5”.
Main Back – Cut 4 pieces at 5 ½” x 4” and score ½” on one long side on each one to create a waterfall element to the back page.
Patterned Papers
Back – Cut 1 at 5 ¾”x 5 ¾”
Top Flap – Cut 2 at 5 ¾” x 4 ¼”
Bottom Flap – Cut 2 at 5 ¾” x 5 ¾”
Middle –Cut 1 at 5 ¾” x 5 ¾”
Waterfall – Cut 8 at 5 ¼” x 3 ¼”
Right Side – Cut 2 at 5 ¾” x 5 ¾” and Cut 2 at 4 ¾” x 5 ¾”
Left Side – Cut 1 at 5 ¾” x 5 ¾” for the back of the left side page.
Plus cut another at 5 ¾” then trim it to 2 ¼” for the front inside pocket. The remainder goes on inside pocket and glue to make a pocket.
Cut 1 at 3 ¾” x 5 ¾” for the inside flap.
Cut 1 at 5 ¾ x 4 ¼”” and then trim to 1 ¾” stick to the front pocket. Then stick the 2 ½” and stick to inside pocket.
Cut 2 at 4 ¾” x 4 ¾” to cover one photo mat.
Cut 2 at 3” x 4 ¾” to cover the other photo mat.
Cut out an envelope and make a little Photo/Journal book to go into your envelope.
Cut 2 slip pockets and 2 tags to go inside the pockets.
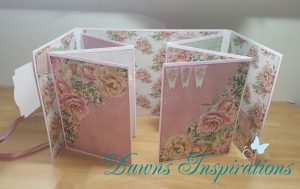
Super Quick Flip Flap Gatefold Mini Album
In this Video Tutorial you to can make your own Super Quick Flip Flap Gatefold Album is made using some card stock and envelopes.
Construction Measurements
Cut one card stock at 11 3/4″ x 7 3/4″ and on the long side score in 3/8″ on both ends.
Cut two card stock at 6 3/4″ x 7 3/4″ and on the short side score one end at 3/8″.
Then glue the spines together to create your album cover. Also at this stage don’t forget to attach your ribbon.
Join three 5×7 envelopes together to make a concertina. and then repeat this with another envelopes.
Now stick these to the back of your album cover – see the video to help you.
Papers for Outside Cover
Cut one at 10 3/4″ x 7 1/2″
Cut two at 5 3/4″ x 7 1/2″
Papers for Inside Cover
Cut one at 10 1/2″ x 7 1/2″
Cut two at 5 3/4″ x 7 1/2″
Papers for Pages
Cut 12 at 5″ x 7″
Then add your own decoration as you wish.
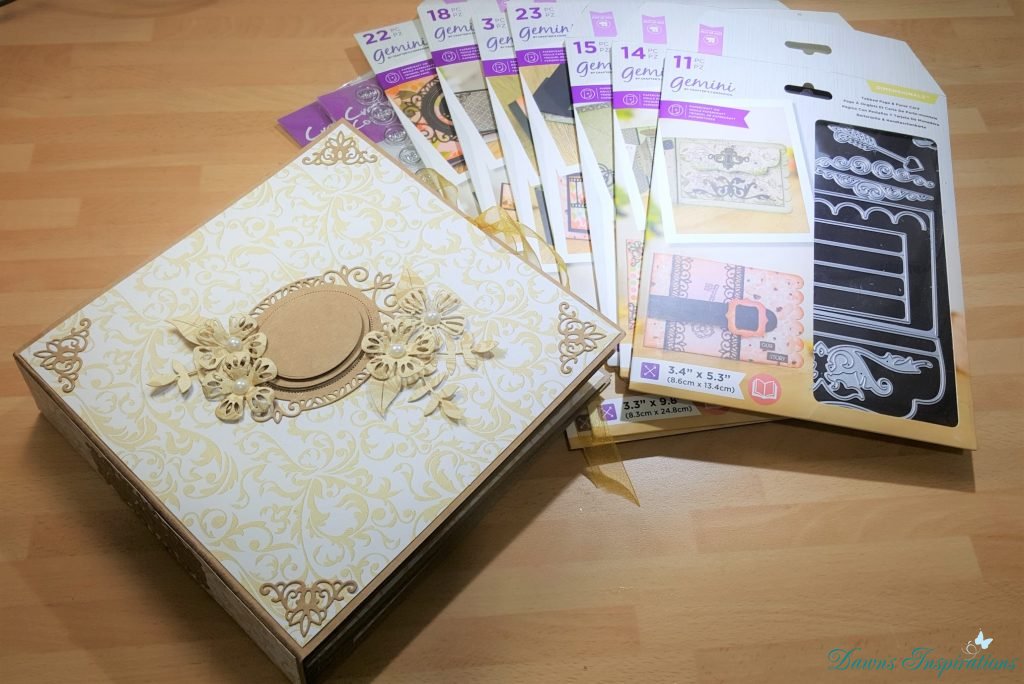
Making a Large Album using the Precious Memories Dies.
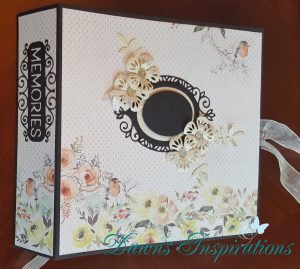

In this Step by Step Video Tutorial I show you how to make a Larger 8×8 Mini Album using the Crafters Companion Precious Memories Hinge Die. Giving you even more possibilities with your Collection.
Here are the basic measurements you will need to create this album. If you watch my Step by Step Video you will then see how to put it all together ready for you to decorate however you wish.
Cover
Cut 2 A4 Card to 8 ¼” 10 ½” and score in 2” in on 1 long side on both pieces.
Hinge
Die cut 2 hinges from the collection and then attach double sided tape to both hinges and then score each one as to stick them.
Cut Card 8” x 3 ½” and score in at ¾” on both sides at the short end.
Cut Double Adhesive sheet to 8” x 1 7/8” and stick to the centre of this card. Then cut 2 more strips of ¾” x 8” and stick to the wings.
Pages
Cut 6 pages from Card 8” x8”.
Stick double sided adhesive to one end and corner round the other 2 corners.
Papers
Outside Cover – Cut 2 at 8 ¼” x 8” and 1 at 1 7/8” x 8”
Inside Cover – Cut 2 at 8 ¼” x 8”
Pages – Cut 12 at 7 ¾” x 7 ¾”
Extra Half Flaps
Cut 4 card at 5 ¾” x 4” and Cut 4 papers at 5 ½” x 3 ¾”
Cards for inside Flaps
Cut 4 cards at 5 ¾” x 3 ¼”
Cut 4 papers at 5 ½” x 3”
Cut 4 white papers 5 ½” x 3”
Photo Mats
From white paper Cut 16 at 5 ¾” x 3 ¾” and punch decorative corners if you wish.
Jean’s Challenge 8 Workshop Finished Album
Jean enjoying doing the Challenge 8 Workshop from my 2019 Weekend Retreat and went home and finished off the whole book so I just had to share her Finished Album as it is BRILLIANT!
8×8 Precious Memories Album
Using Crafters Companion Precious Memories Collection I have create this 8×8 Mini Album. Perfect for holding lots of photos and memorabilia to document many precious moments in our lives.
Gift Table Setting
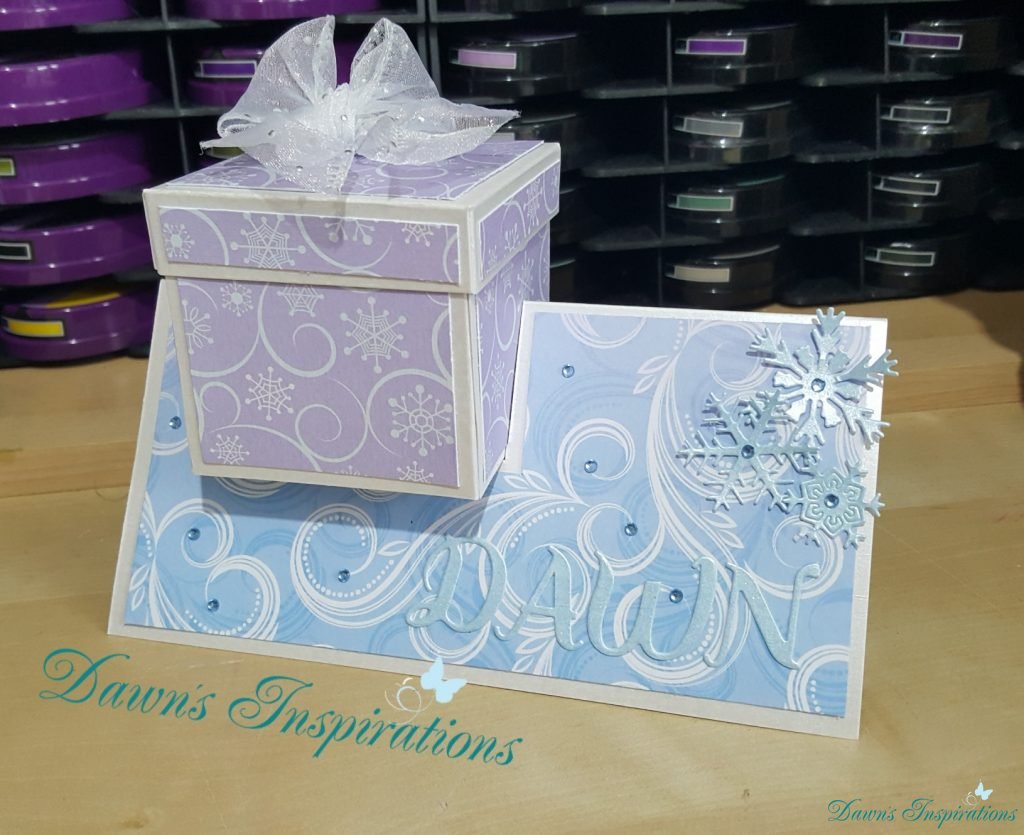
Why not have a go at making these Quick and Easy Table Setting?
Just perfect for Christmas or a special event. Using the Double Sided Box Dies from Crafters Companion.
Following my Step By Step Video Tutorial for all the measurements and how to make. Enjoy!
Triangle Accordion Roll -Double Sided Box Dies
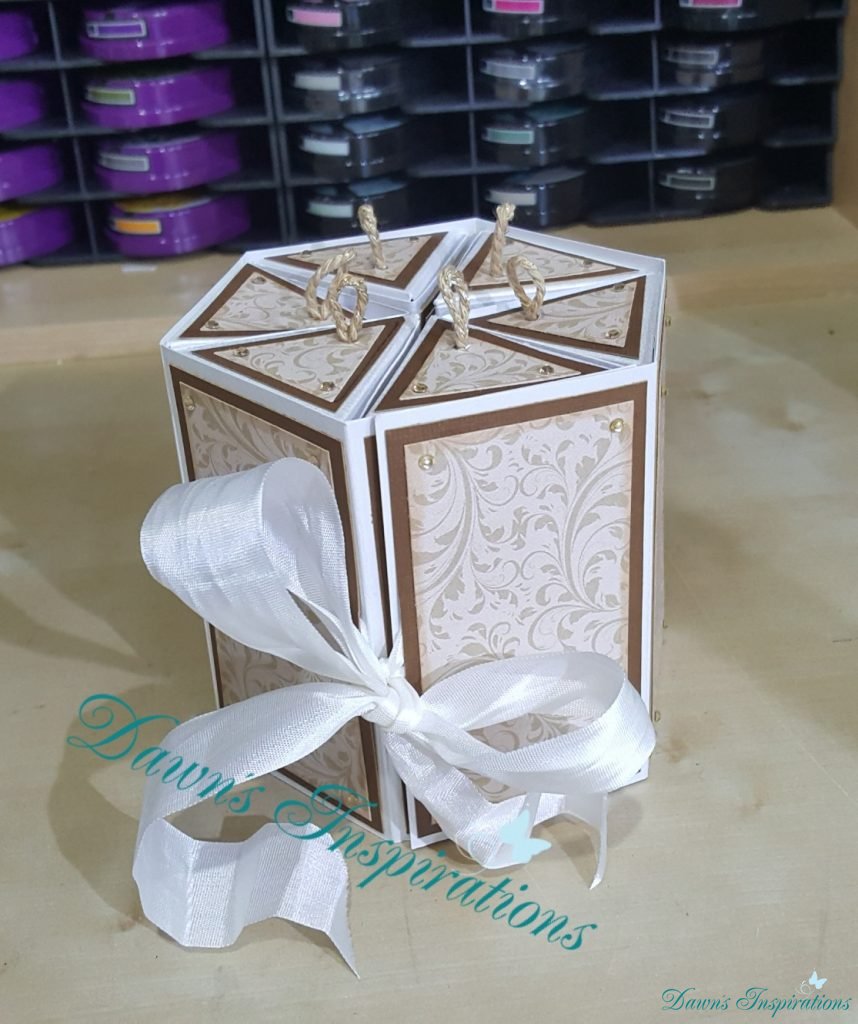
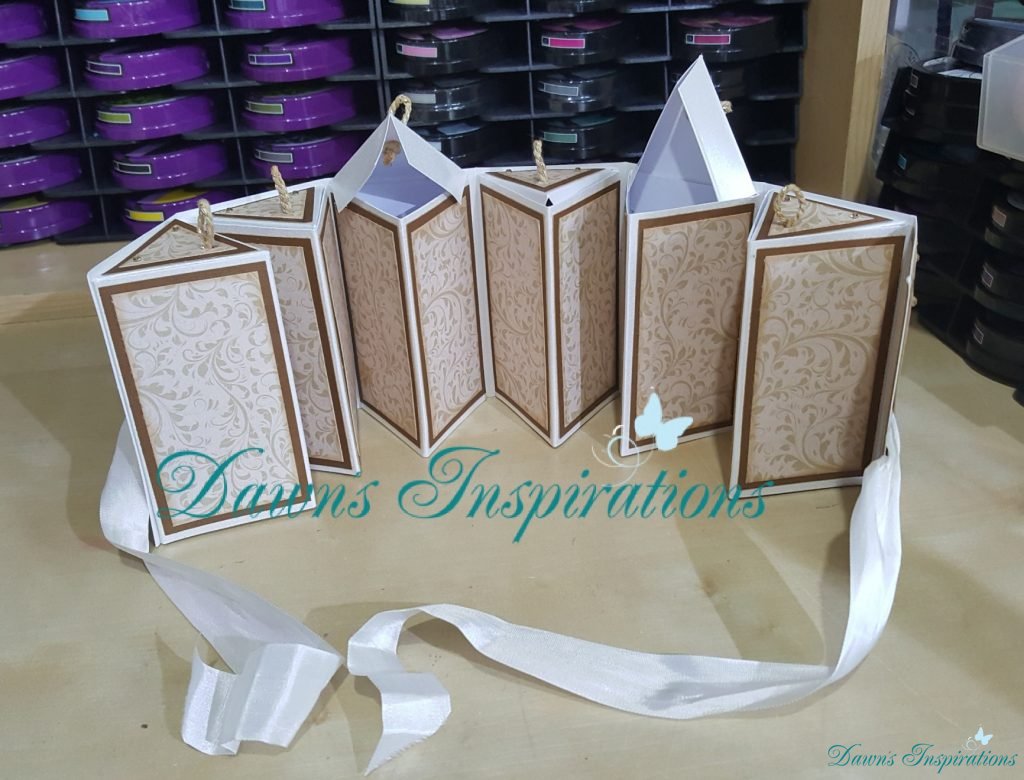
Using the Crafters Companion Triangle Double Sided Box Dies I have created this accordion roll. Perfect for filling with gifts for that real Wow Factor!
Just follow my Step by Step Video Tutorial so you can make your own.
Making Drawer Sets
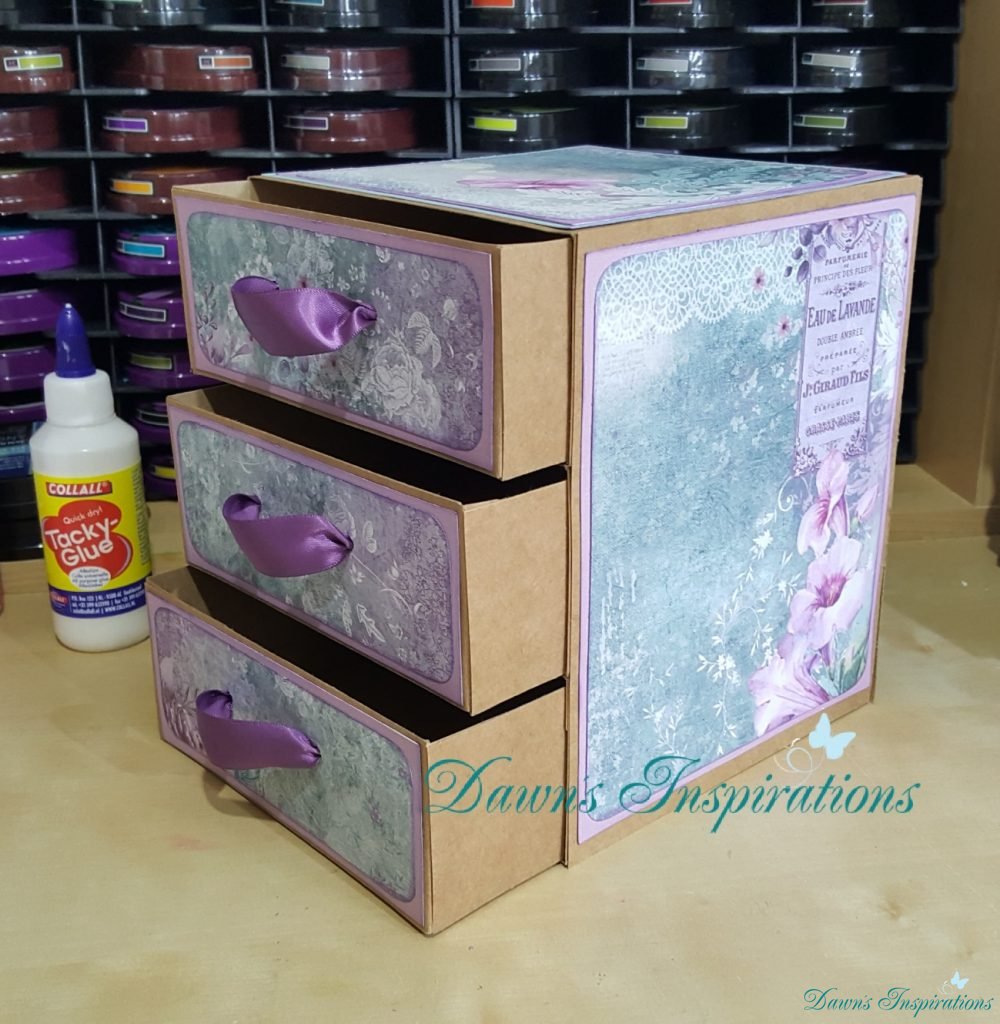
Want to make up your own Drawer Sets? Well it couldn’t be easier with these Double Sided Box Dies from Crafters Companion. make your draws any depth you like and stack up as many as you like.
Follow my Step by Step Video Tutorial to see just how easy it is. Enjoy!
Add Deeper Sides to your Double Sided Box Dies
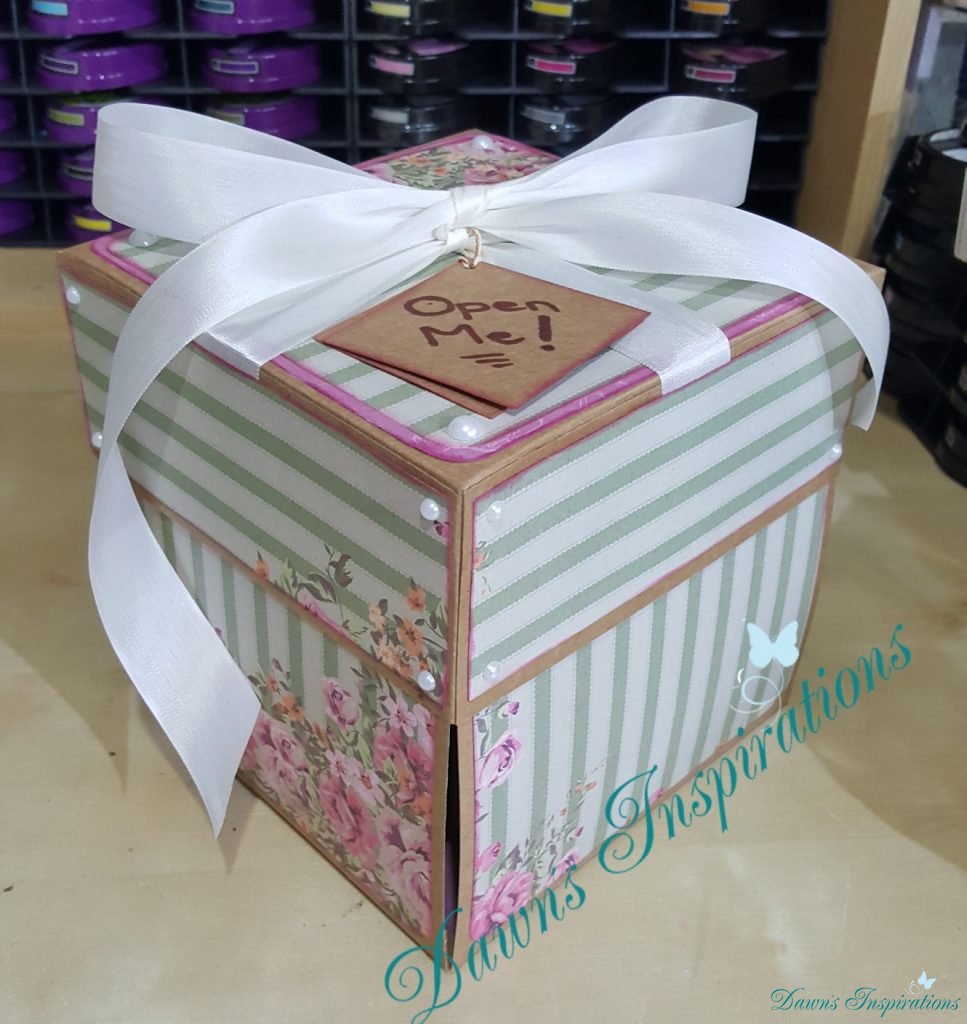
Are you loving the Double Sided Box Dies from Crafters Companion? Well I am and to get the most from your dies you can easily add deeper sides to create boxes of all sizes. You can even make up Exploding Boxes very easily using these new Double Sided Box Dies from Crafters Companion.
Here is a quick video showing you how easy it is to add deeper sides to both your Boxes and their Lids.
Advent Calendar – Triangle Double Sided Box Dies
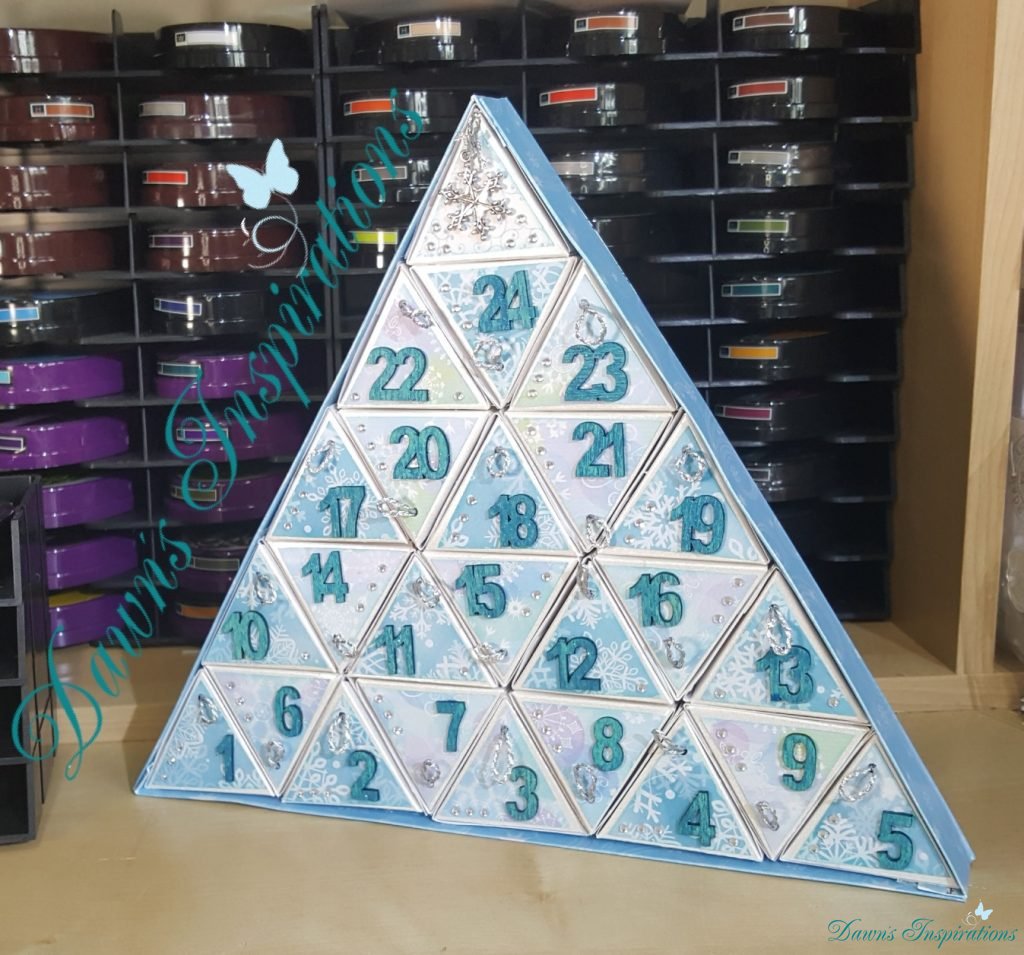
Why not create this beautiful Advent Calendar using the Double Sided Box Dies from Crafters Companion. I have used the smaller of the Triangle Dies for this project and create a hinge system so each door opens on a hinge.
To make your own why not follow my step by step video tutorial.
- « Previous Page
- 1
- …
- 4
- 5
- 6
- 7
- 8
- …
- 13
- Next Page »