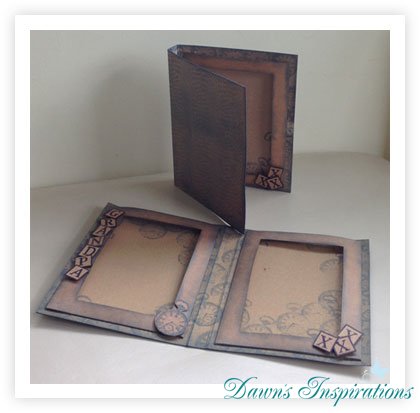
 Here in the UK Father’s Day is in a couple of weeks, so here is a quick and easy project.
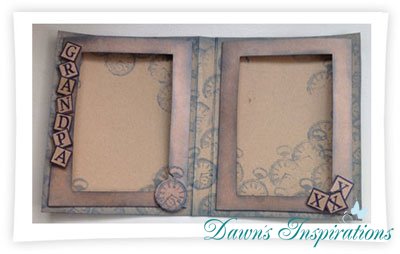
The Card Frame makes a great gift, all you then need to do is slip in your 6×4 photos and you have the perfect gift to put a smile on any Dad or Grandfathers face.
So get crafty and make a special gift for the man in your life.
Supplies you will need;
2 sheets of A4 Kraft Card
I sheet of kraft packaging or chipboard
Embellishments if you wish
2 photos of 6×4 measurements
Measurements;
Cut one of the A4 sheets to measure 7″ x 11 1/2 ” Next I put this through my Ebosser using the A4 Cable embossing Folder.
I then on the longside scored this in 5 1/2″ on either end. Using a distress ink pad I then inked over the embossed pattern to show more texture.
Next I stuck this down to my Kraft packaging/chipboard using Collall All Purpose Glue and set it to one side to dry. While this is drying you can then make your frames.
From your other sheet of kraft card cut 2 pieces measuring 5 1/2″ x 6 3/4″ and score this in at 1/4″ on 3 sides. Now using a cutting die or kraft knife make an aperture frame to showcase your photos. Ink you edges to match your project.
Using your stamp of choice you can stamp a background to your cover to give this a patterned look. I then used a letter stamp set to make my words to give my project a personal touch. I cut these out and stuck them down with 3D Glue.

Your Card Frame is now ready for you to add your photos and give as a gift for Fathers Day.
Other ideas for Fathers Day Gifts
Faux Leather Notebook Cover Tutorial
Desktop Flip Style Mini Album Tutorial

Can you tell me from you get all your scrapbooking stuff, I mean the tools, paper and other embellishments you use?
Hiya, I have got my tools and supplies from various places, like craft fairs craft shops and online. I do look online for the best deals and if there are any sales. My trimmer and corner punch was online, my scoreboard and decorative puches are Stampin Up. I get card and paper from where ever has the best deals. Sorry I can’t be of more help. x
Hi ingroopa
I am fairly new to the world of scrapbooking (Oct/2013) and I would say I fell head over heals in love with it. I had basically nothing, except paints as I paint a lot. Diving into a new craft was an expensive prospect especially scrapbooking ( another reason why I LOVE Dawn’s Inspirations she is cost effective)
I did some comparative shopping and I found the best deals online. I am in Canada so I’m always communicating with the seller on shipping, ensuring no surprises. I try to find a single seller that has many of the items I’m looking for and I ask to combine shipping costs. Also look at different scrapbooking stores online, and Amazon or EBay. Hope this helps:)
Hiya and welcome,
I am so glad I have inspired you to take up a new hobbie and that you are enjoying it.
I’m always looking at the best way to get the most out of a kit or paper collection but most of all using what we would throw away too.
I also love the freebies that come free with craft magazines and that is why I started the File Folder Mini Series a great way to make a mini with very few supplies.
Thank you for taking the time to email me and enjoy your new hobbie.
Dawn
Hello, in the USA, we do not have DL envelopes (4.33 by 8.66). We use No.10 envelopes ( 4 1/8 by 9 1/2). I bought your awesome tutorial but yikes!!!!! My envelopes are not working out due to the size difference. Can you give me measurements based on the No. 10 size? It sure would be easier if we all had the same unit of measurements……but until then can you help?
Hi Cherri,
I have followers from all over the world it is so hard to find products that are universal to all the counties that follow me. I picked the DL size as it is a standard office envelope which is used for 1/3 fold A4 use in business. But even A4 is different in the US.
I have emailed you amend instructions the new measurements are in red, but as you can see there is not a lot of difference.
Instead of cutting the slither off the sealed end of the envelope and you cut it down as suggested this then makes the length the same as a DL envelope. You then only need to adjust the height of the patterned paper mats and they will also fit. Your chipboard covers are then also fine as the original measurement.
I hope this helps and you can now enjoy this Online Workshop?
Happy Crafting
Dawn