This is a quick and easy tutorial for to follow and in no time at all you too will have you own Mini Album out of one sheet of double sided patterned paper.
This is another great mini album that takes cut down 6×4 photographs.
So get you photos out of boxes and off the computer and put them into some lovely mini albums for you and your love ones to share.
One Hour 6×6 Mini Album
Dawn shows you that even a beginner can make a 6×6 Mini Album in an hour.
This step by step video show you with a few basic supplies and tools, you too can make a beautiful 6×6 Mini Album in no time at all.
The album is also made using very few scrapbooking supplies.
For this project you will need;
- two and a half sheets of 12×12 cardstock,
- 12 sheets of 6×6 patterned paper or 4 sheets of 12″ x 12″
- two MDF/chipboard covers.
From Card
- Cut 6 pieces at 6″ x 6″ and 5 pieces at 2 1/4″ x 6″ and score in at 1″ on either short side end.
- From Card cut one piece at 3 3/4″ x 6 1/4″ and score in 1″ in on both ends.
- Cut 2 pieces Chipboard at 6 1/4″ x 6 1/2″.
Patterned Papers;
- Cut 10 pieces at 5 3/4″ x 5 3/4″
- Cut 2 pieces at 6″ x 6″
How to make your own Tab Embellishments
With the use of a circle punch and scraps of card stock or patterned paper use can make your own tab embellishments to match your scrapbook layouts and mini album projects.
In this Quick Tips Video, Dawn shows you how to make your own Tab Embellishments.
Decorative Box from 1 sheet of 12×12 paper.
This video shows you how to make a decorative gift box from one sheet of 12×12 double sided patterned paper. I great gift box idea for both ladies and men.
These decorative gift boxes are great for giving small gifts/treats and they are quick and easy to make.
They also look great on your dinner/Christmas table as a place settling with a small treat in them too.
Once you have made a few you can always store them flat ready for when you need them.
Measurements for this project are;
Using one sheet of 12 x 12 double sided patterned paper.
Score at 1″ 1/2 , 3″ , 3″ 3/4 , 8″ 1/4 , 9″, 10″ 1/2 .
Then turn your paper a quarter turn.
Score at 3″, 4″ 1/2, 7″ 1/2, 9″.
You can then follow the video tutorial to see how the make the project.
Quicktips – Paper Clip Embellishments
Paper Clip Embellishments are a quick and cheap way of adding interest to your layouts or projects. Along with knowing they will match what you are doing if you use the scraps from your paper collection you are using.
I like to use the large paper clips as I find they stand out more on your scrapbooking projects.
They also come in a array of colours along with gold and silver tones so you can always match the project you are working on.
Quicktips – Pen your Edges
Instead of always using a ink pad to take of that just cut look the edges of your paper. Why not dust of your Promarkers or similar pens and use these to edge your papers.
Using the chisel of your pen, run it along the cut edges of your papers to finish of your projects instead of inking.
I am not say you can do this on all your projects because sometime you need that ink edged /distressed look however, it will work well on alot of them and it is quick. You can also use any colour pen to match your work.
Another way of using your pens is with a ruler to give a thicker line, this is great way to edge your work so it looks like it has been “matting and layered” especially if you do it in Black or a darker colour.
So dust of you pens and give it a go!!! Check out the video to see how easy it is.
Edwinstowe Scrappers November Kit
I attend the Edwinstowe Scrappers Crop and here are two sample layouts I have made using the November Club kit which is supplied by Papermaze.
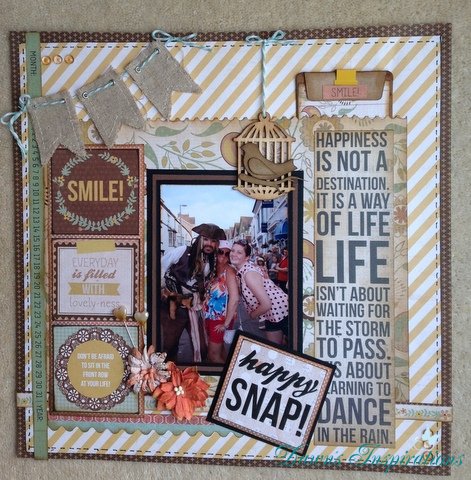
This 12×12 layout uses most of the elements from the kit, I have used lots of laying to create this one photo layout.
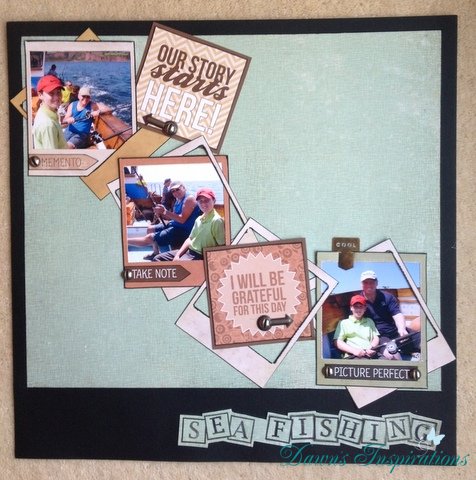
I kept this layout simple using the instagram style frames to create a different multi photo layout. I even cut a large frame to mount the 12×12 layout onto.
Teresa Collins Memorabilla Scrapbook Layouts
This video shows you how to make two 12×12 Interactive Scrapbooking Layouts and a mini book using the Teresa Collins Memorabilla Range.
For this project Dawn has used the 6×6 paper pad, a packet of the mini file folders, 1 sheet of the 12×12 paper, on sheet of white cardstock, 2 acco file fasteners, large paper clips, bakers twine, a black promarker and adhesive.
File Folder Mini Album – Style 1
This great little mini album is made you an ordinary office file folder and a free paper pack from a craft magazine.
I got my file folders from staples they come in a various colours however, I have chosen buff as they go well with most paper collections.
Also by using buff you can then add Kraft card stock to make extra tags and photo mats.
It is the perfect size to hold your 6×4 photos and great as a gift or just to hold photos from a day out or an event.
Craft along with me using this video tutorial and you to can make your own File Folder Mini Album.
Easel Card
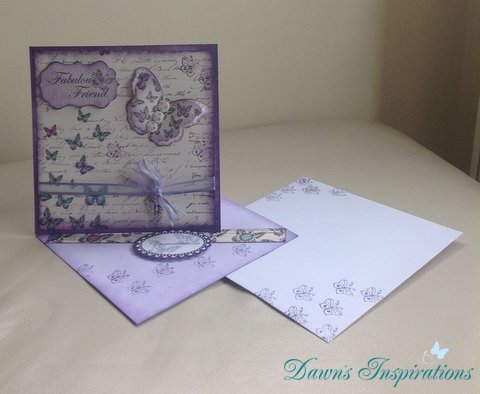
This is a quick easel card I have made for a friend. I used all the things I had in my crafty stash. The things I have used are, square white card and envelope, patterned paper collection and die cuts from Crafwork Cards, distress ink pad, small butterfly stamp and ribbon.

Easel cards are quick and easy to do but look like you have spent hours on them but “Mums the Word!” I won’t tell…… I good tip is to use things that all match together and with that co ordinated look your cards will look more professional. Take the time also to decorate your envelope, this attention to detail just finishes off your projects.
So go on have a go a making some cards even if you have not done this before,they are quick to do and are much more personal that shop brought ones.
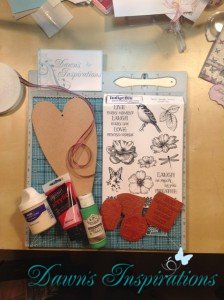
Heart Wall Hanging
This is a wall plaque I have made for a very good friend.
It is a quick easy project that can be done in an afternoon with a few crafty materials.
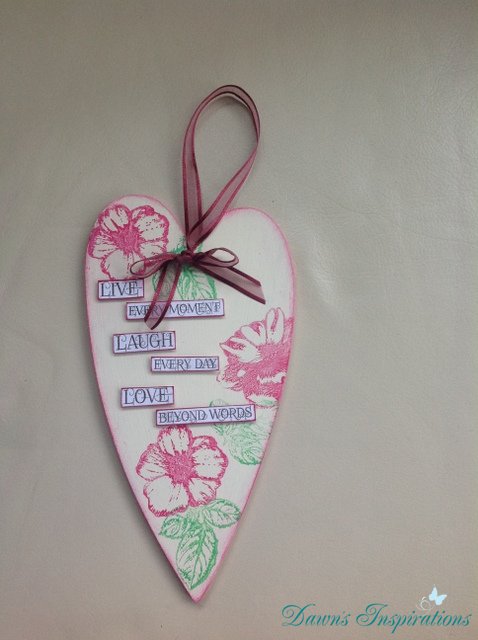
Things I have used are; An Indigo Blu large folk heart made from MDF, Indigo Blu “Live Laugh Love” stamp set, Acrylic paints/match pot paints, white card, brown stazon ink pad and ribbon.
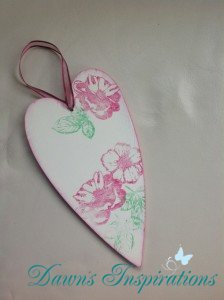
Start by given you MDF heart a couple of coats of acrylic paint, this will be your background colour.
While ths is drying you can stamp out your saying on to white card using your stazon ink pad.
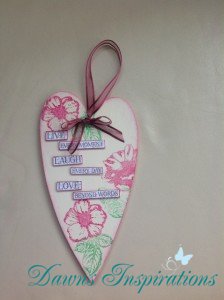
Then cut out the words an ink around the edges of each one using an ink pad or a promarker.
Then using acrylic paint (I mix mine with a bit of white paint to get the colour I was happy with) stamp your images on to your heart. I stamped some images on the back too. After you are happy with your plaque you can then wash your stamps in soapy water and leave the to dry.
Using foam pads mount your words on to your plaque to give it a little bit more interest.
Finish off your plaque by threading the ribbon through the hole and making a bow. This then also gives it a hanging handle.
Now you plaque is ready to be given away as a special gift of just keep it for yourself.
Thanks for taking the time to look at this project, I do hope you have ago as it is very simple but stunning and makes a beautiful gift.
Mini scrapbook tutorial using 1 sheet of 12×12
This video tutorial shows you step by step how to create 3 different styles of mini scrapbook albums using just one sheet of 12×12 double sided pattern paper.
The perfect handmade mini gift that is quick and easy to make.
Here are the measurements for each album, now you can watch the video and make up your albums.
Wallet Pocket Book Cut paper 12″ x 10 1/2 ”
on the 12″ side score @ 6/8″ 3″ 6″ 9″ & 11 1/4″
on 10″ side score at 1″ & 5 3/4″
Mini Notebook Scrapbook Cut paper 12″ x 9 1/2″
on 12″ side score @ 3″ 6″ 9″
on 9 1/2″ side score @ 4 3/4″
Cut a piece of paper 4 3/4″ x 1 3/4″ and score this at 3/4″ & 1″
Mini Pocket Book Paper needs to be 12″ x 12″
on one side score@ 1 1/2″ 6″ & 10 1/2″
on the other side score @ 3″ 6″ 9″